Quantcast
Channel: Sally Ann
Viewing all 358 articles
Browse latest View live

Coming soon: American Tourister Collection

$
0
0
Coming soon: a collection of vegan, eco-friendly handbags, made from recycled materials, recovered hardware, salvaged zippers, and a vintage American Tourister suitbag. A collection of 16 handbags. Are you excited? I know I am!

The hangbag, above, was made from curtains, a vintage zipper, scraps, and the belt from the inside of the American Tourister bag. I've managed to use almost every piece of vinyl from the bag, and all kinds of vintage scraps and textiles. Agh, I've so excited for this collection. I have a handful to finish, along with straps for a few. 


Must. Keep. Sewing. I've drank almost a pot of coffee, and I had an apple drizzled with honey for breakfast. Coffee+sugar high, yeah!! While sewing, I'm listening/rewatching the TV show Lost. Second season just started about twenty minutes ago, and they're entering the hatch. I love rewatching old TV shows I've seen a million times while working. Then I just listen, and I don't have to take my eyes off my work. 

So I know I've been neglecting my blogging duties this week, but for good reason, and you all shall see soon enough! This collection is going to be so amazing! Have a great Friday, everyone! 

Life Lately...

$
0
0
Work work work. Sewing has been day in and day out for me lately. When I'm not sewing, I'm planning what I'll be sewing next, or out on a video shoot with Matt. I've got the fever! I have a huge show this weekend, and it will coinside with me releasing a new line of handbags and small accessories. You'll see soon enough!

I've also been perfecting the layout and organization of my work room. It's always an uphill battle to keep a work room 100% functional, clean, and productive whilst being bombarded with two cats and a dog. Take Clem for example, above,... I was organizing belt hardware and she decided to make that a bed. Thanks, cat. Make yourself at home on my work table. I trick them most time by putting sheets in a box like it's fabric I plan to use and they're on it, pronto!

And again. On everyyything. Instead of buying zippers and hardware, I always try to harvest them from other things when I can. I found a bargain on old luggage at a local St. Vincent De Paul, 50% off. At $3 per bag, with up to 6 or 7 zippers per bag, plus hardware and fabric, it was a great deal. While it's a lot more time consuming to rip out all the zippers, they are sturdier than store bought ones, and I have an excuse to watch an episode of Downton Abbey while doing it. Plus! I'm keeping everything recycled! Yay!

This handbag I made last night. Will be presented with the entire collection later this week! Hooray, I'm so excited and proud of myself I can't wait to photograph it. Crossing my fingers that I can get to it later today. My to-do list is monstrous! 

Anyone with sewing rooms can relate to this, right? Gah. Thread is the bane of my existence! Always getting caught up in the wheels of my work stool. I use an old doctors stool to wheel around my hardwood floors. A few times a week, I take a razor blade and clear out the castors. But never fails, within a few days, I have to do it again. AGH! Such is the life of a seamstress.

Well, folks, that's all! Gotta get back to workin'! Have a pleasant day, and hope all is well in your neck of the woods!

The American Tourister Collection and it's debut at VegFest!

$
0
0
Here it is. And I'm so proud to share it with you. The American Tourister Collection from Sally Ann. I made a 50 piece collection of accessories from all kinds of recycled materials. Primarily made with and inspired by an American Tourister piece of luggage, the purses and other accessories mimick the look of brown earthtoned leather, and combine functionality with versitility. 


As a part of this vegan art and food festival, VegFest required that all things sold be "vegan" and animal free. This rule was a great challenge and push for me to create a cohesive collection for fall and winter. Where I'd normally use a pair of leather pants or a suede dress, cut it up, and make a bag with a sturdy bottom, I replaced that leather for this faux leather. As a result of this collection, I'm pretty sure I'm going to stick with the vegan stance with my brand. I'll use leather here and there, but I love working with vintage luggage, and challenging myself to really use every last piece. 

Selling close to half of the collection on Saturday, above are some happy customers, posing with their purchase. I'm still in the process of posting them on Etsy, so be patient. I'm also making a handful 'add-on' handbags that were *this close* to completion for Saturday's festival, but a girl's gotta sleep, right?

My new hog friend, Kevin Bacon. This little piglet is only three months, and we first met when he was about 4 weeks old. He's the sweetest little piglet, and he always stops by my booth with his 'parents'. I recently switched to a mainly meat-free diet (still can't kick fish completely) and also cutting out all dairy, and it's wonderful to see this little guy and know that I will never (knock on wood, willpower) eat pork again. Seeing his little face makes all the difference. 

That was the best part about this festival, talking to all kinds of people about the vegan lifestyle and what it entails, seeing 100% vegan products, eating amazing food, and of course, getting to tell people how I made a collection just for them, on this day!

Along with purses, I made 15 small pouches, and 15 sunglasses cases, all from the smaller scraps of "pleather" from the suit bag. I think I have a few pieces left the size of a quarter, that's it! I am proud to say that I utilized every last piece, and wasted very, very little with this collection. 

It couldn't have been a more beautiful day at Riverside Park. My friend Michelle, looking sassy on the far right, helped out all day, and we had such a fun time. Matt and my sister, Rachael, were also there for a while. Such a great day. I wish this festival was every weekend!

Purse and a matching skirt. 

Now time to set up my photo studio for photo time! We turned out guest room into a photo room, since we have much fewer guests than we anticipated, when we decided upon a three bedroom house. It will allow me to have better, clearer, crisper photos for my online shop, and hopefully more tutorials as well. I am staying away from showing y'all how messy my work room is at present, and should spend a few days cleaning, but no time, NO TIME! Must sew, and soon! Hope everyone is having a great week! 

DIY Pillowcase for a Throw Pillow Made from a framed wall hanging

$
0
0
As Matt and I continue to settle into our home, I'm still trying to rearrange throw pillows, wall hangings, put together swatches for curtains, and it's finally almost a perfect home. Today, I'm going to show you how to make a throw pillow from a tapestry, or any fabric for that matter. It will close with a zipper, and a flap to hide the zipper, giving the pillow that extra polished look.

This wall hanging has been in all my homes since I was 18 years old. Bought for about 50 cents at a thrift store back home, it reminds me of Marushkas. If you look closely, you can see it's not a perfect rectangle. It's always been a bit off, and that made me love it even more for being irregular. Somewhere throughout it's 30+ year life, the wood warped and it's wider at the bottom than the top. And I was finally ready to take it apart for a throw pillow.

You will need: 
  • Fabric/wall hanging
  • Scissors
  • A zipper as wide or wider than the pillow height. I used an invisible zipper
  • A zipper foot attachment for your sewing machine
  • Measuring tape
  • Matching thread
  • Straight pins
  • A throw pillow
Start by removing your wall hanging from it's frame. I simply used a flat screwdriver to pry it from it's wood frame.

Next, measure your pillow (this step not pictured, but it's pretty self explanatory). Multiply the wide by two and cut out fabric. So, for example, my pillow is an 18" square, so I needed my block of fabric 38" by 20" to allow for a seam allowance. This means that you have extra room on the fabric to account for the seams. 

Then, cut a 2" strip as tall as the pillow. I cut 20" by 2". Press this strip lengthwise in half. Open up your zipper, and sew the zipper to the strip of fabric, sewing along the raw edge side. You want to have extra fabric on the opposite side of the zipper. This flat will hide the zipper when it's all together.

Now sew this flat to the pillow, with good sides together, directly over top of the previous seam you just sewed. Press open.

Close up your zipper, and fold your fabric, good sides together. Fold that flap open to the opposite side (so in this next step you don't sew it to the pillow. Match up the tops edge of the fabric, and pin the zipper to the raw edge of the fabric. 

Depending on your zipper you may not have to do this step, but I like to get as close to the zipper teeth on this side of the zipper, so I changed out my regular presser foot attachment to a zipper foot. Sew the zipper to the fabric.

Now that the zipper is attached, it's time to close up the top and bottom of the pillow. Placing the zipper in the exact center of the pillow, pin the top of the pillow closed and sew with a 1" seam allowance.

 Repeat this step on the other side, checking your measurements at equidistant at each side.

And viola! Look at that fancy backside of your pillow. No one will ever guess that you made it with that pretty flap hiding the zipper. As you can see by looking at my pillow, it wasn't as wide as it needed to be, so I cut the pillow down to the proper height, and used the excess fabric from the top of the fabric, and pieced it to the back to make it wide enough. I used all but a tiny 3" strip of fabric.

And now it's the perfect throw pillow! I can't wait to get new couches soon, and make more pillows. Matt isn't a fan of some of the prints that I choose, but I'm hoping he'll fall in love with them after I make them and add them to the couches. 

So whatcha think? Questions? Comments!

The American Tourister Collection for sale online!

$
0
0
Phew. Finally. Time to take a break... well, as soon as I finish this blog post. Ha. My new collection is now available in my Etsy shop.

Gosh, if there's one thing I could do without, in terms of owning my own design business and online store,... I absolutely despise listing things on Etsy. The photo shoot, not too bad, but man, listing things on Etsy, I hate it so much! But I do it, because I love selling my work. So here it is... click here to see the 17 remaining handbags from the American Tourister collection. And enjoy a few pictures of my new pieces.

This bag is my absolute favorite. While the whole collection is made form a vintage suitbag, on the bottom side of each bag, they are all 100% vegan. This one is also made from vintage curtains that hung in my apartment in Augusta, Georgia. My sister, Rachael, bought them for me, and I just loved them. When I moved into my last apartment in Georgia, before we moved to Florida, I never put them back up, and then Matt moved in, and the last thing he wanted in our room was cat curtains haha. I'm happy to know that I've made a few badass bags with them. AND! I only used one of the two curtains, so there will be 2-3 more bags with this print coming soon.

Another fav. This fabric was given to me by a fellow RAM vendor, Evon's Muse. Christie told me she had a few yards of an awesome fabric, and that she was going to bring me a yard to cut up for my new collection. The next week, when she brought me the cutting from her holt, I was SO PUMPED to use it! I made 3 different handbags with what she gave me, all with different color zippers, and still 100% vegan!

Meow meow. Another cat purse. This one made from a pair of women's scrubs! Not kidding. Love this one. There are two of these available.

And tomorrow, time to cut out twenty more purses to make during Thanksgiving vacation, just in time for Small Business Saturday. I can't wait until Christmas, when I'll take a mini-vacation. Hope you are all having a great week so far!

Market Day and Prepping for Thanksgiving

$
0
0

Hello friends, and happy Saturday! We're up bright and early this morning for Riverside Arts Market. Today is Dogfest Walk'n'Roll. So if you're in the area, be sure to bring your pup and swing by my booth in the lower half of the market. I'll have a little jar of small milkbones for your fur baby. 

We finally we able to get the entire American Tourister Collection up for sale in my Etsy Shop. Be sure to check that out as well. The collection was originally 50 pieces, but we're down to 20 after a few weeks at the local markets. I can't wait to figure out and plan my next collection, that will debut two weeks before Christmas. It will be small, but it will be amazing.

After the market today, I'm really excited to finally get to go take a look at CoRK Arts Open Studio Day. It's an 80,000 square foot factory that has been converted into artist spaces, studios, and a few galleries. It's my dream work space, but they haven't had vacancies in forever. Today is one of two days a year they open the entire space to the public, all the artist studios and everything. 

Sunday, Matt and I leave Jacksonville for the week of Thanksgiving, heading back to Augusta to spend time with his family. I'll be sewing all week (of course), prepping for small business Saturday. Work never ends.

How has your week been? What have you been up to? Whatcha think of the new collection? 

My 'new' Singer Genie 354

$
0
0
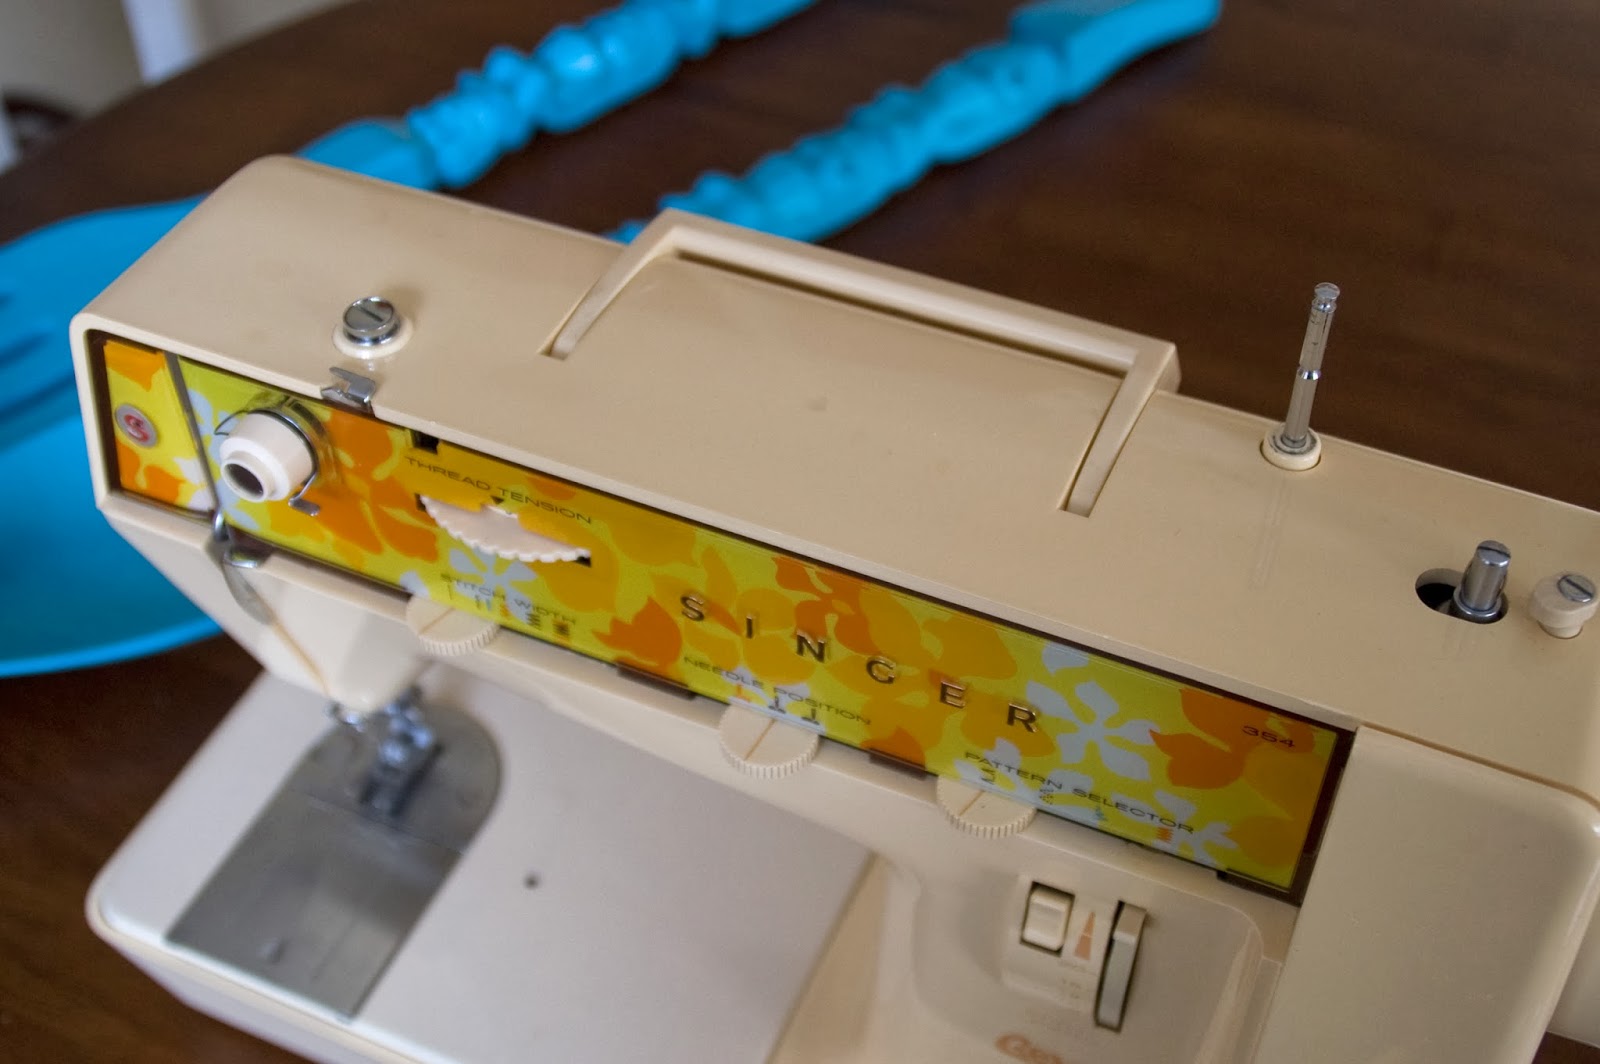
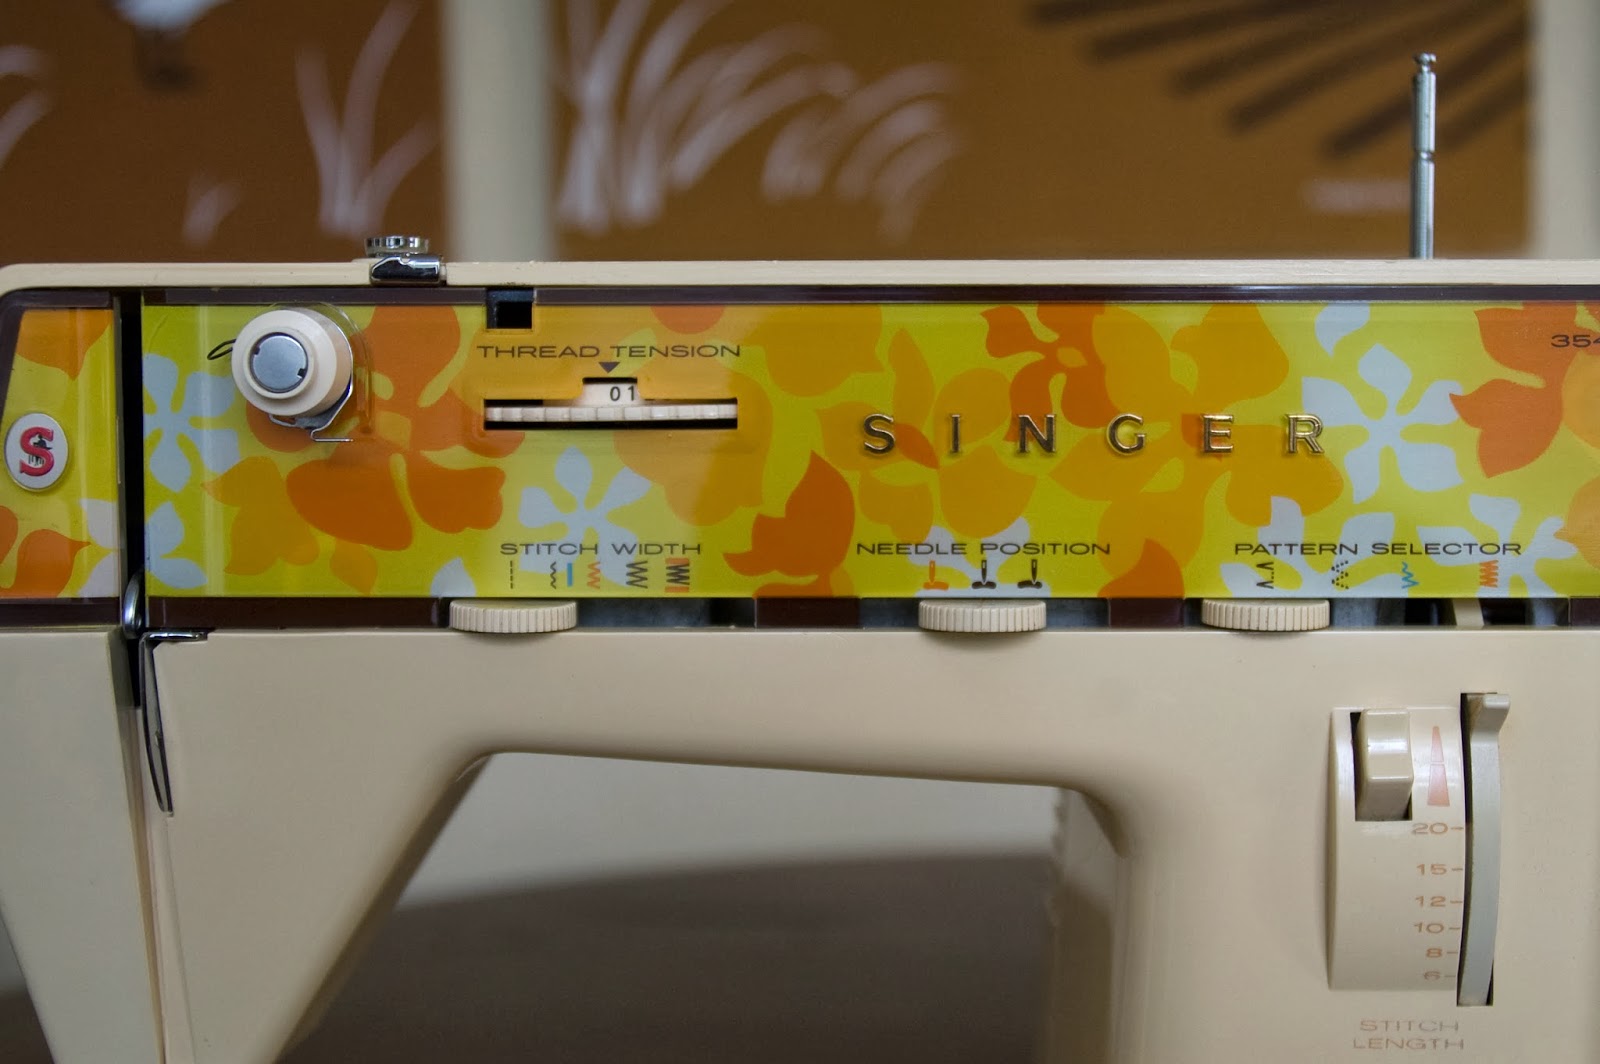
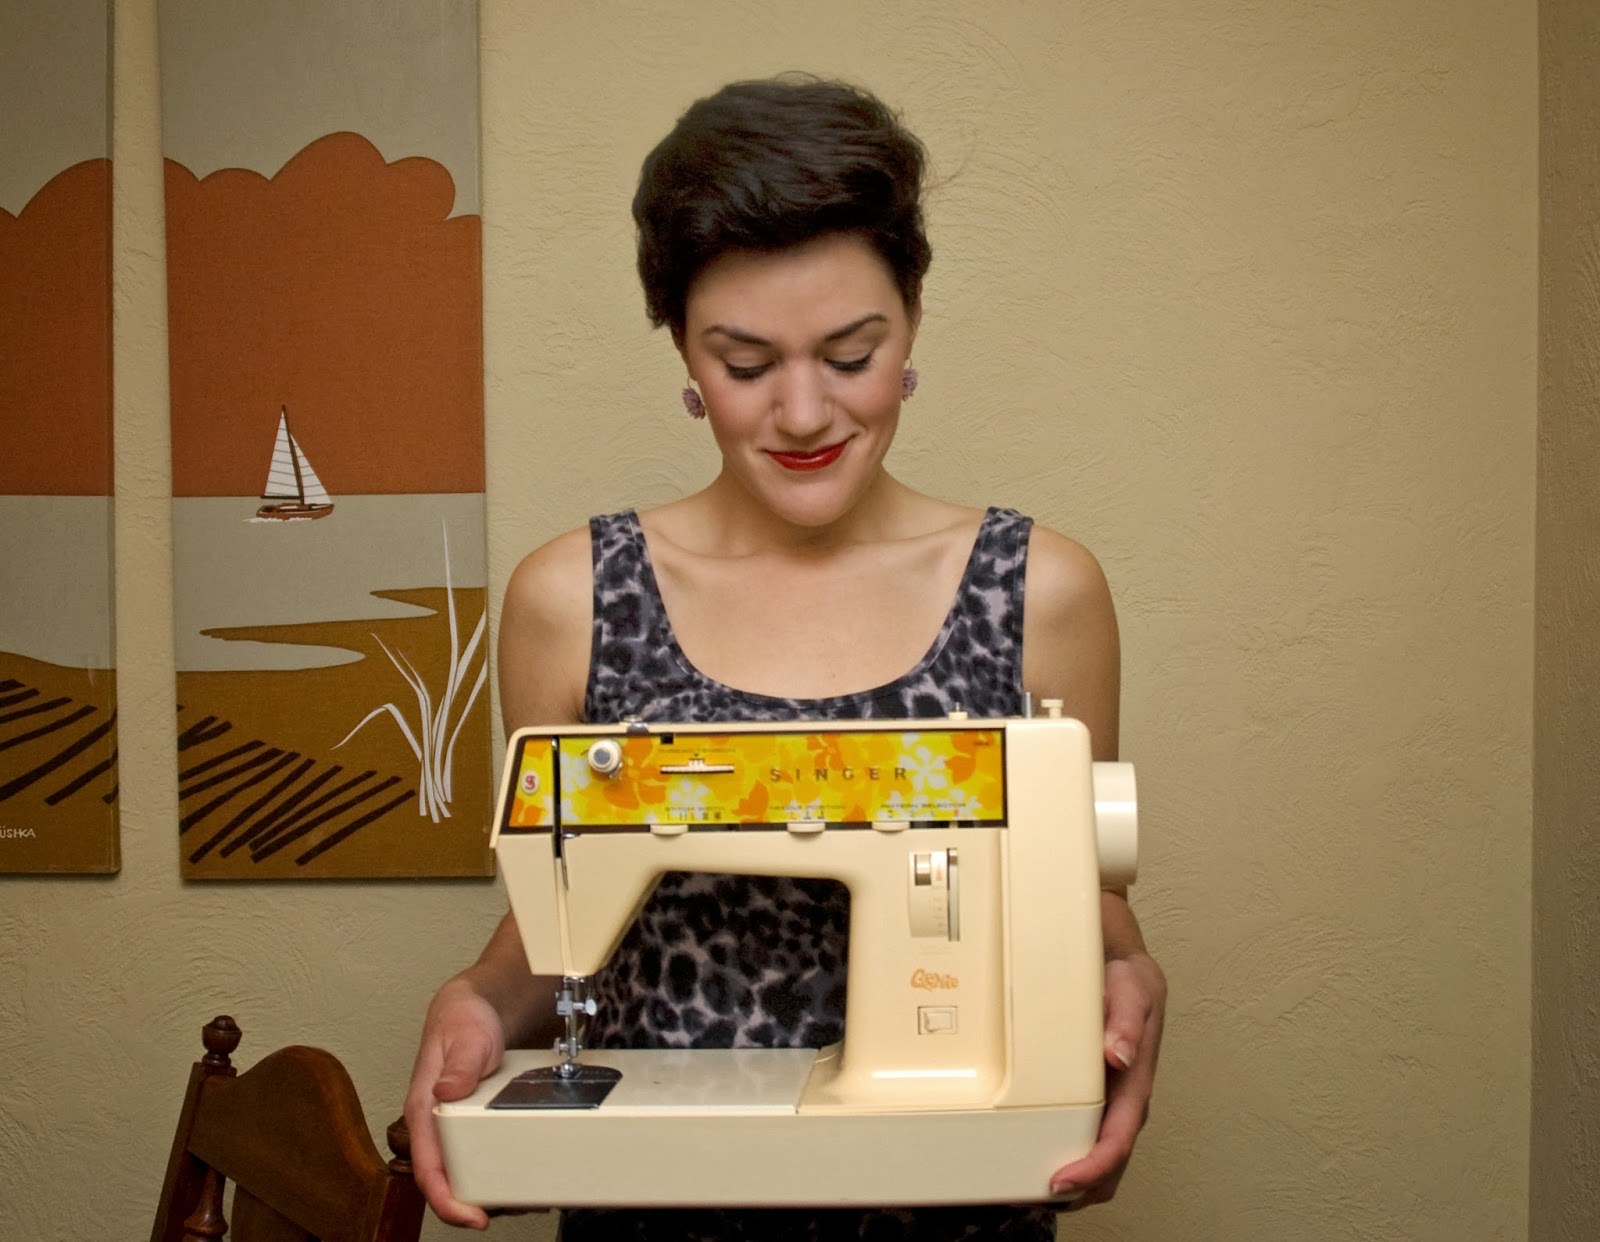
My newest sewing machine, purchased this morning, is a real beauty. It is a Singer Genie 354, manufactured in 1974 in France. I was so lucky, it is in perfect condition. Absolutely perfect! And soooo pretty! 

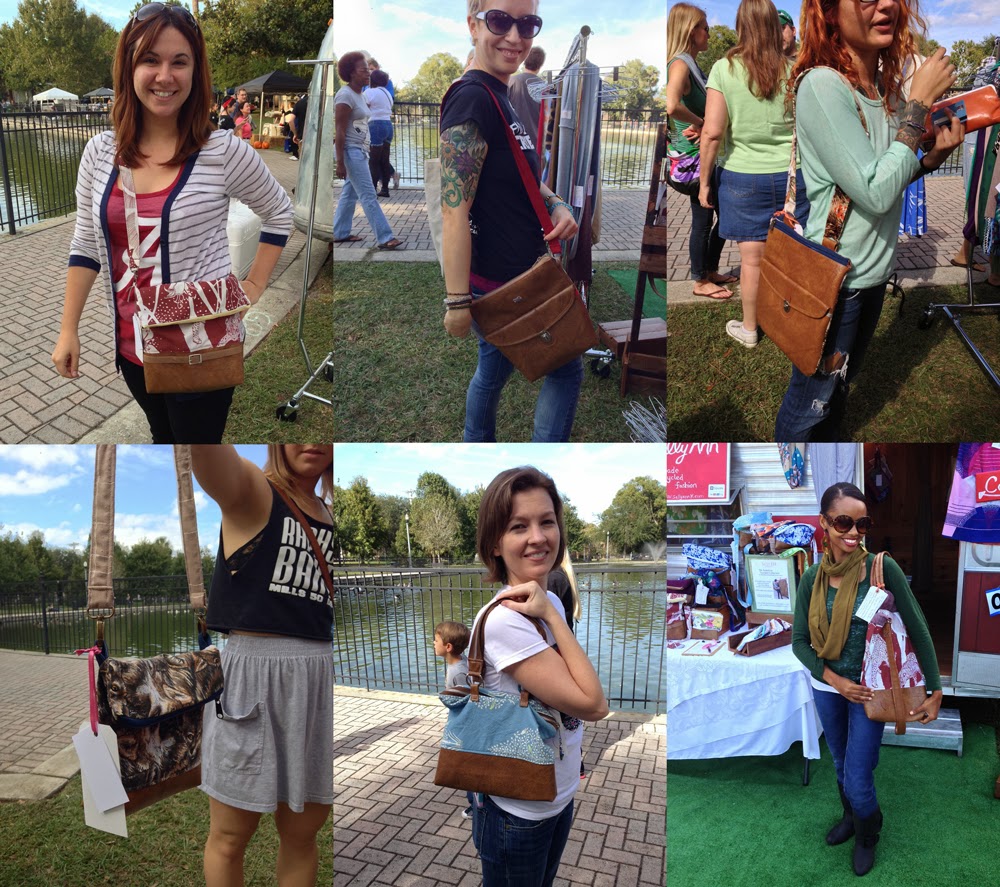
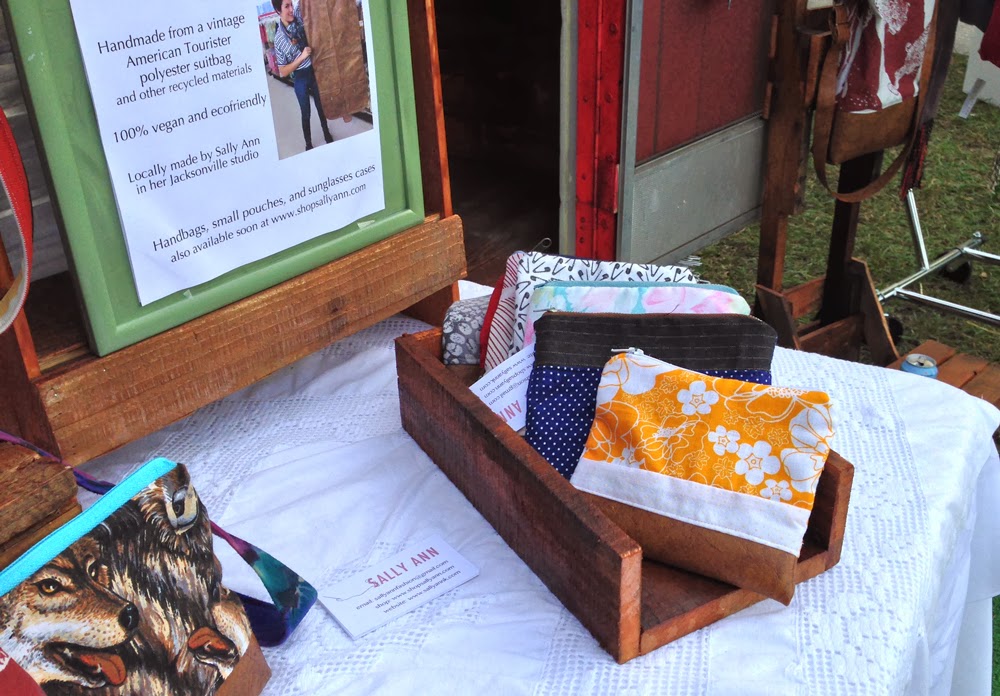
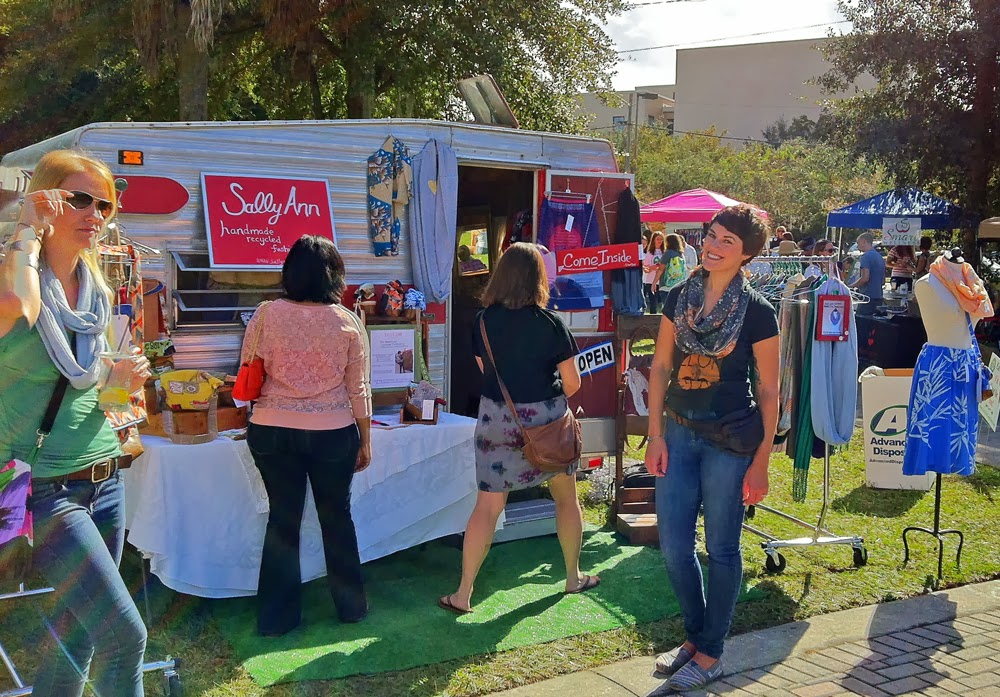
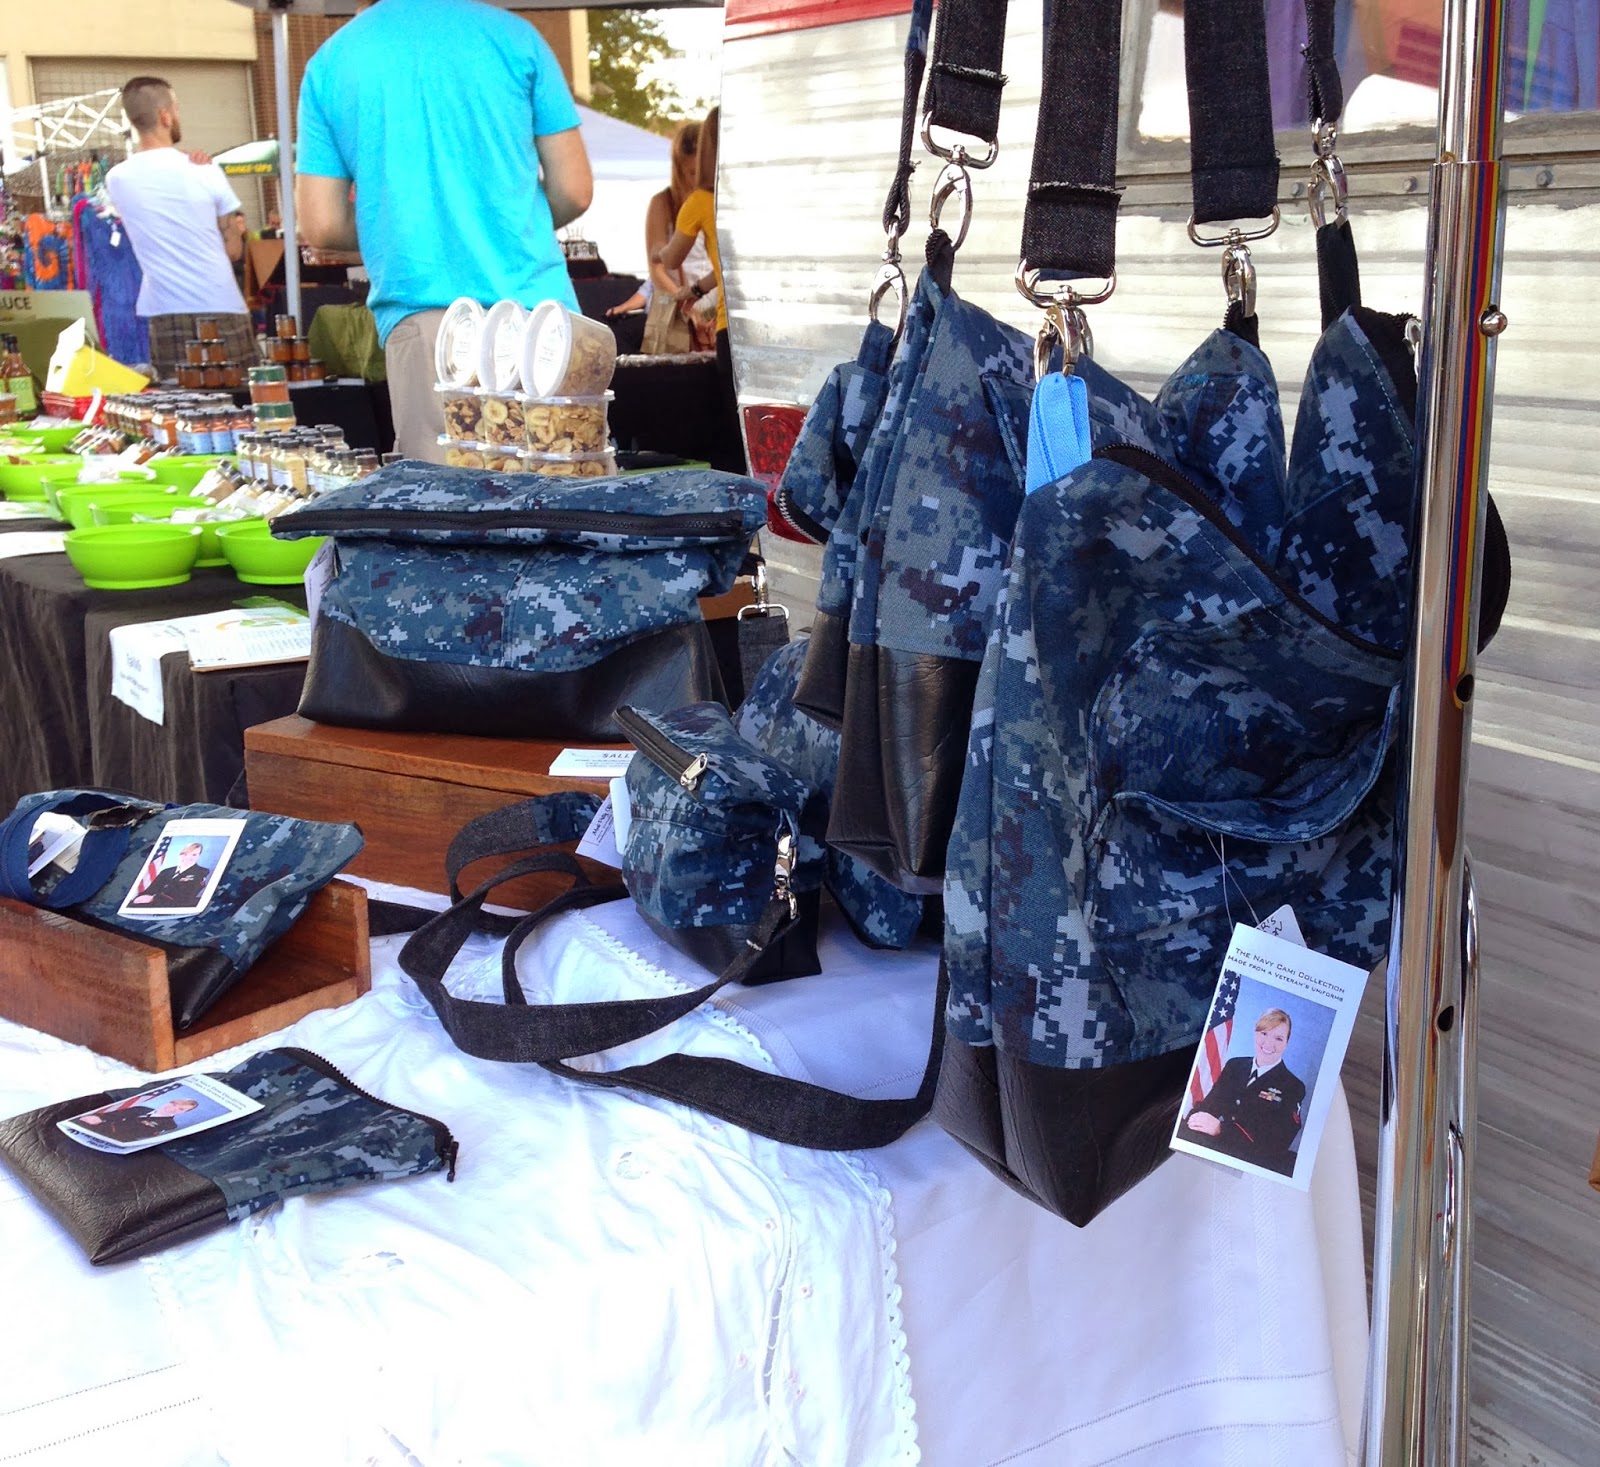
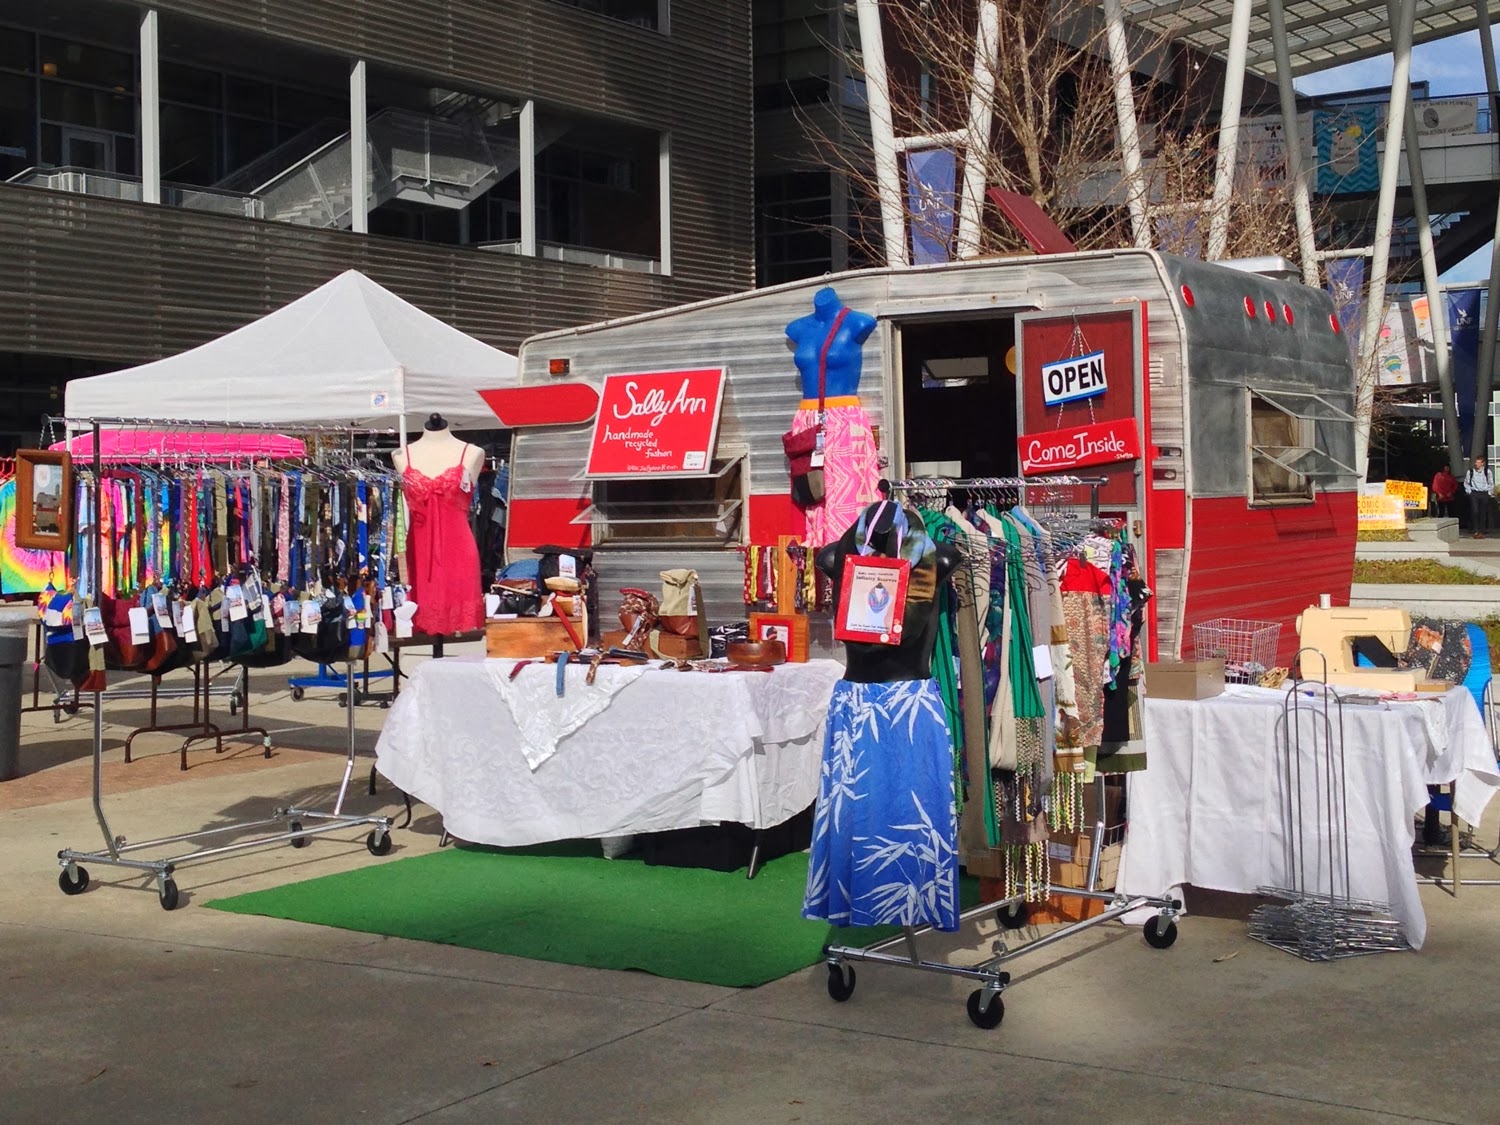
After Riverside Arts Market yesterday, I came home to Matt watching college football. The Auburn/Alabama game was a must see game at the end, but when I got home, it wasn't all that exciting to me. With nothing else to do but also watch, and recover from the long day, I got on Craigslist mobile. Starting with the arts & crafts section, I immediately found a scroll saw for Matt for only $40, and texted the seller. I continued shopping and found this machine. As SOON as I saw it I was blown away by how beautiful it was. I can't believe I've never seen this machine.

I love browsing the vintage sewing machines, and as soon as I came across this baby, I knew I had to have it! I went to text the seller of this machine and immediately noticed it was the same seller as the scroll saw. Bonus! And both were still available. We set up a time bright and early this morning to go check out both items.


We woke up early this morning to drive across town, to a small trailer park tucked away off Highway One. The dude's yard was nuts! Cars everywhere, weird tools I couldn't identify, rotten card tables, toys, plastic dolls, even a hotdog stand, all covered by a canvas carport; it was honestly quite creepy and borderline hoarding territory. The man told us he is a flea market vender, so you name it, he's got it. 

After chatting for a while, plugging the machine in to test the circuitry, he told me the machine belonged to a woman in the neighborhood that had just passed away, and her daughter didn't know how to sew, with the machine ending up in his hands for resale.

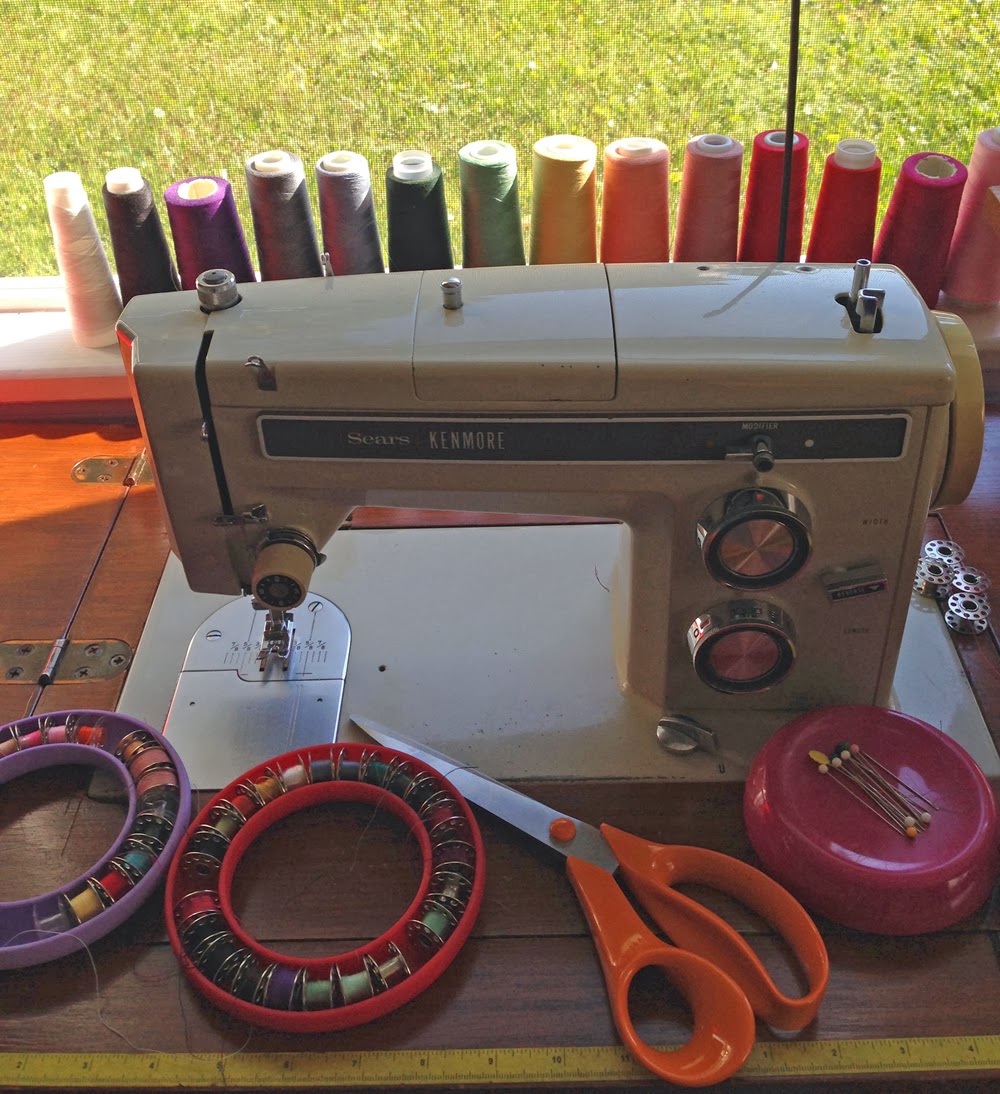
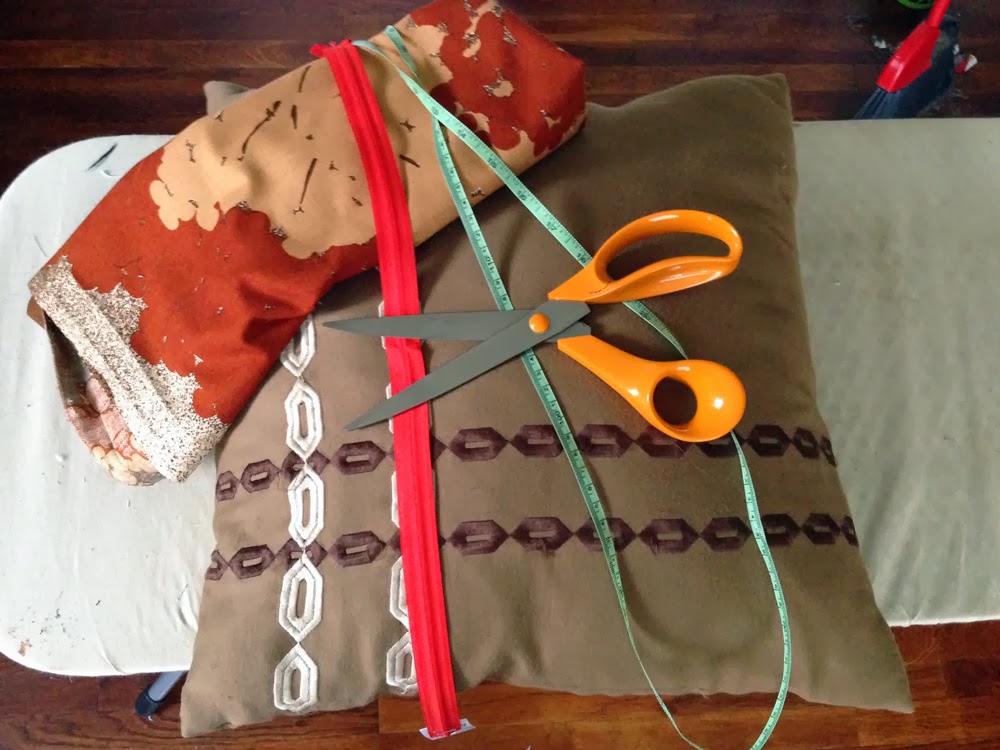
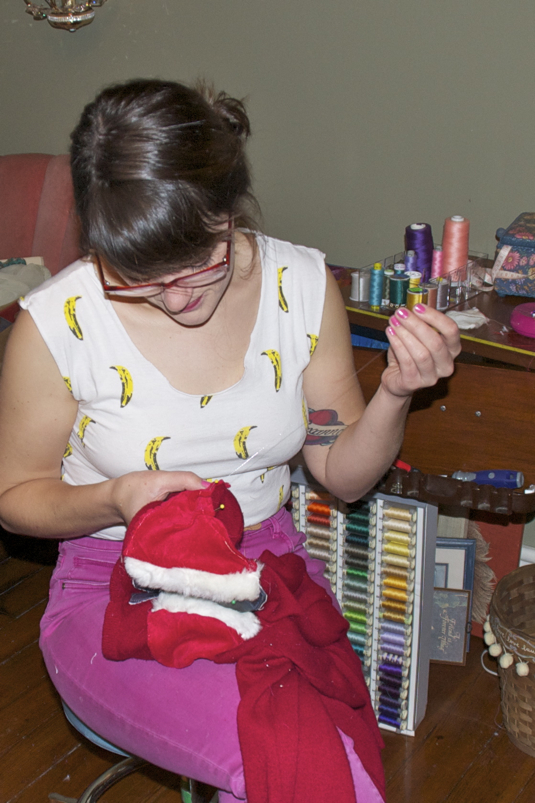
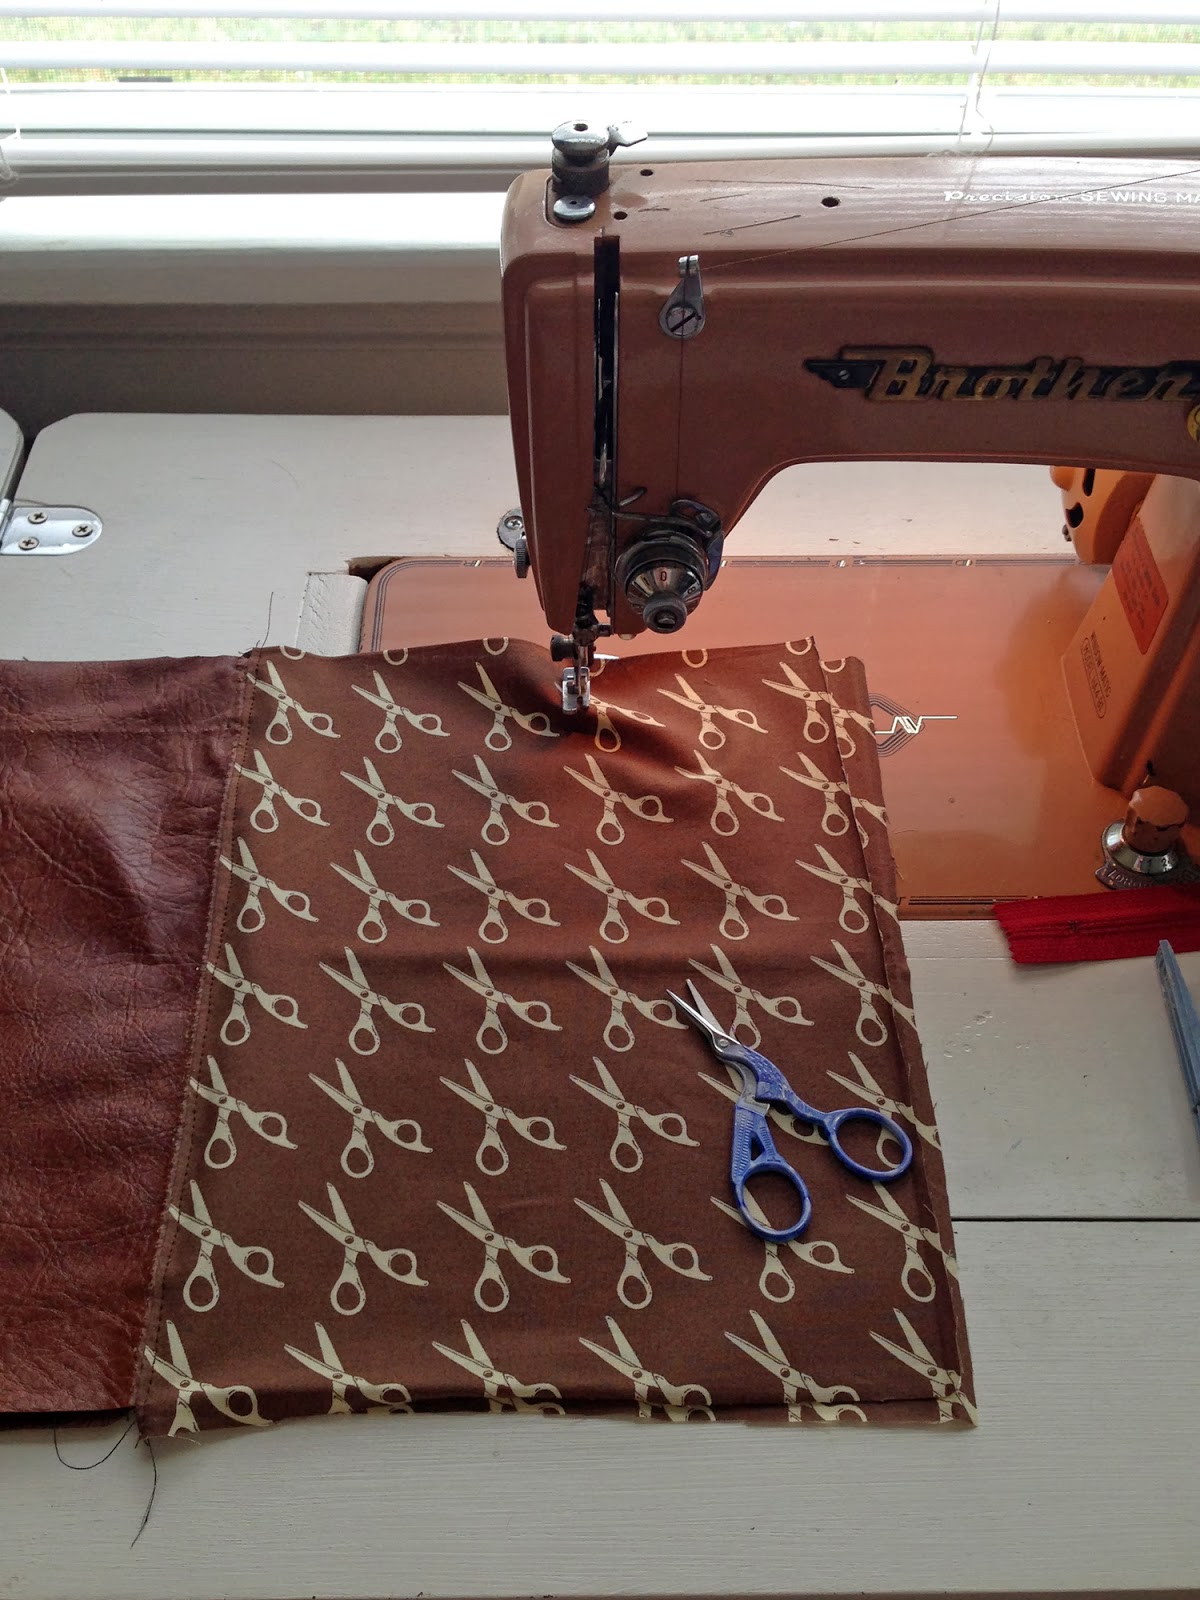
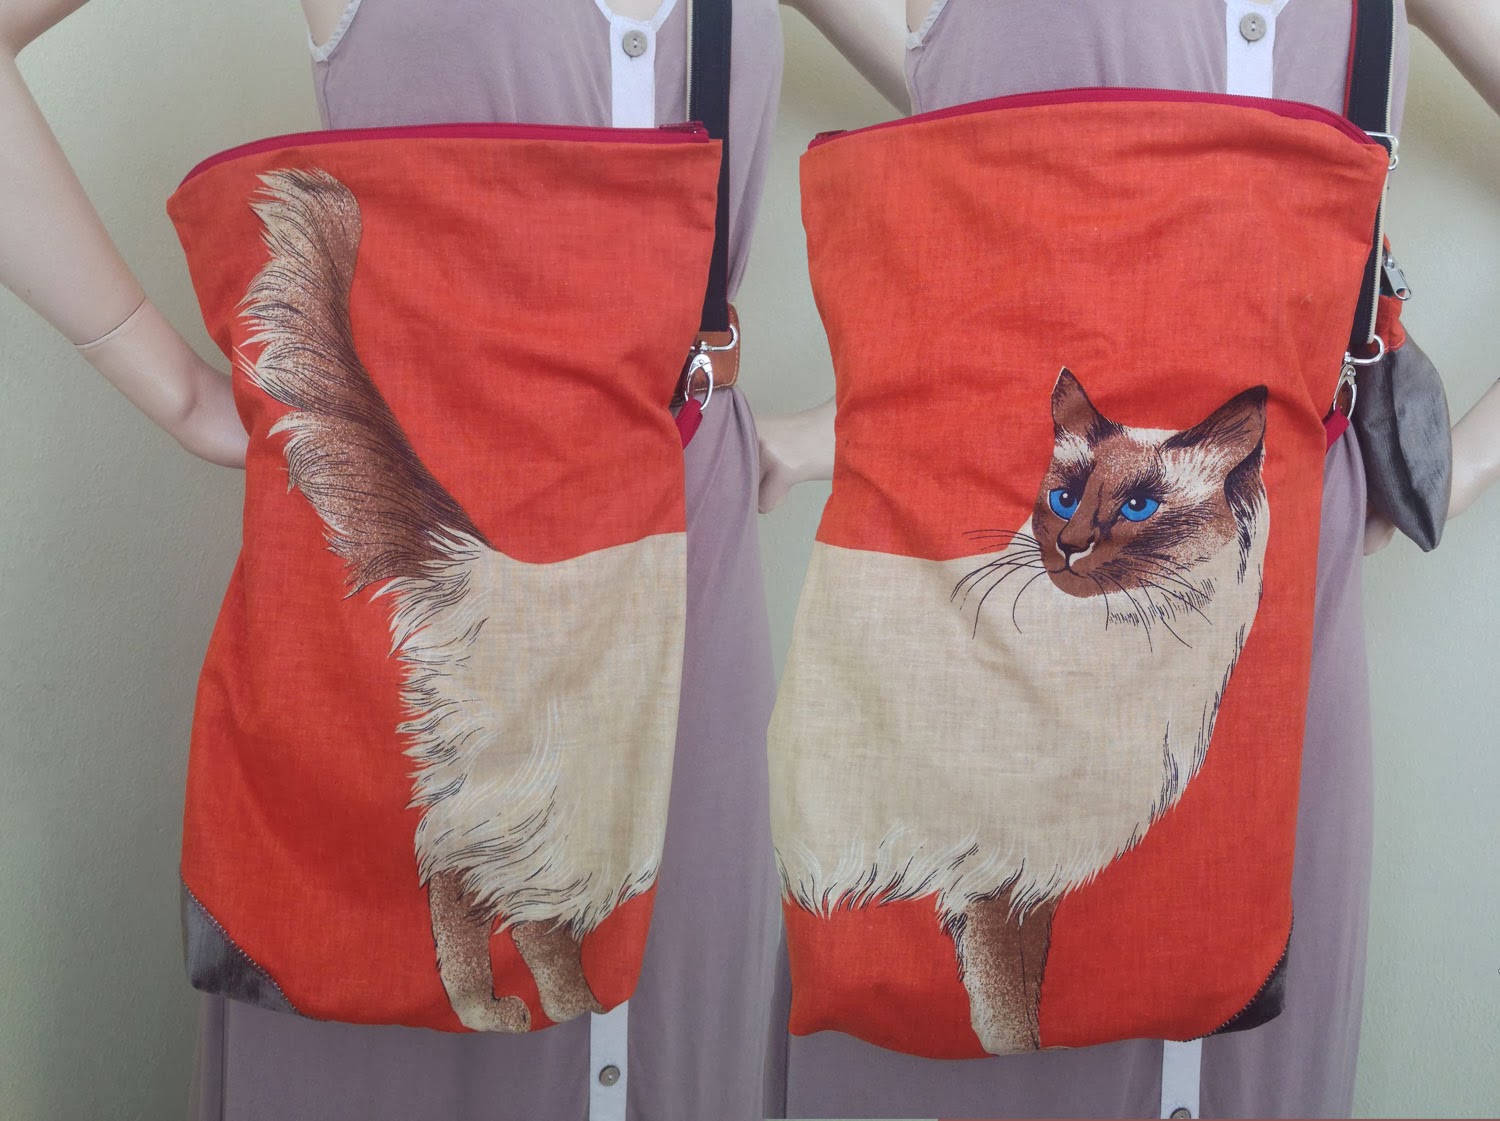
As I usually do when I check out a used machine, I brought with me: a bobbin, a spool of thread, a machine needle, scrap fabric, and scissors. That way, I can check the timing and tension and see how well the machine works. Unfortunately, the machine uses a different size bobbin that is smaller than a standard bobbin, so I failed on that test. But upon plugging her in, and pressing on the petal, she purred like a kitten. A nice quiet hum, timing sounding just perfect, and I said "I'll take it!"


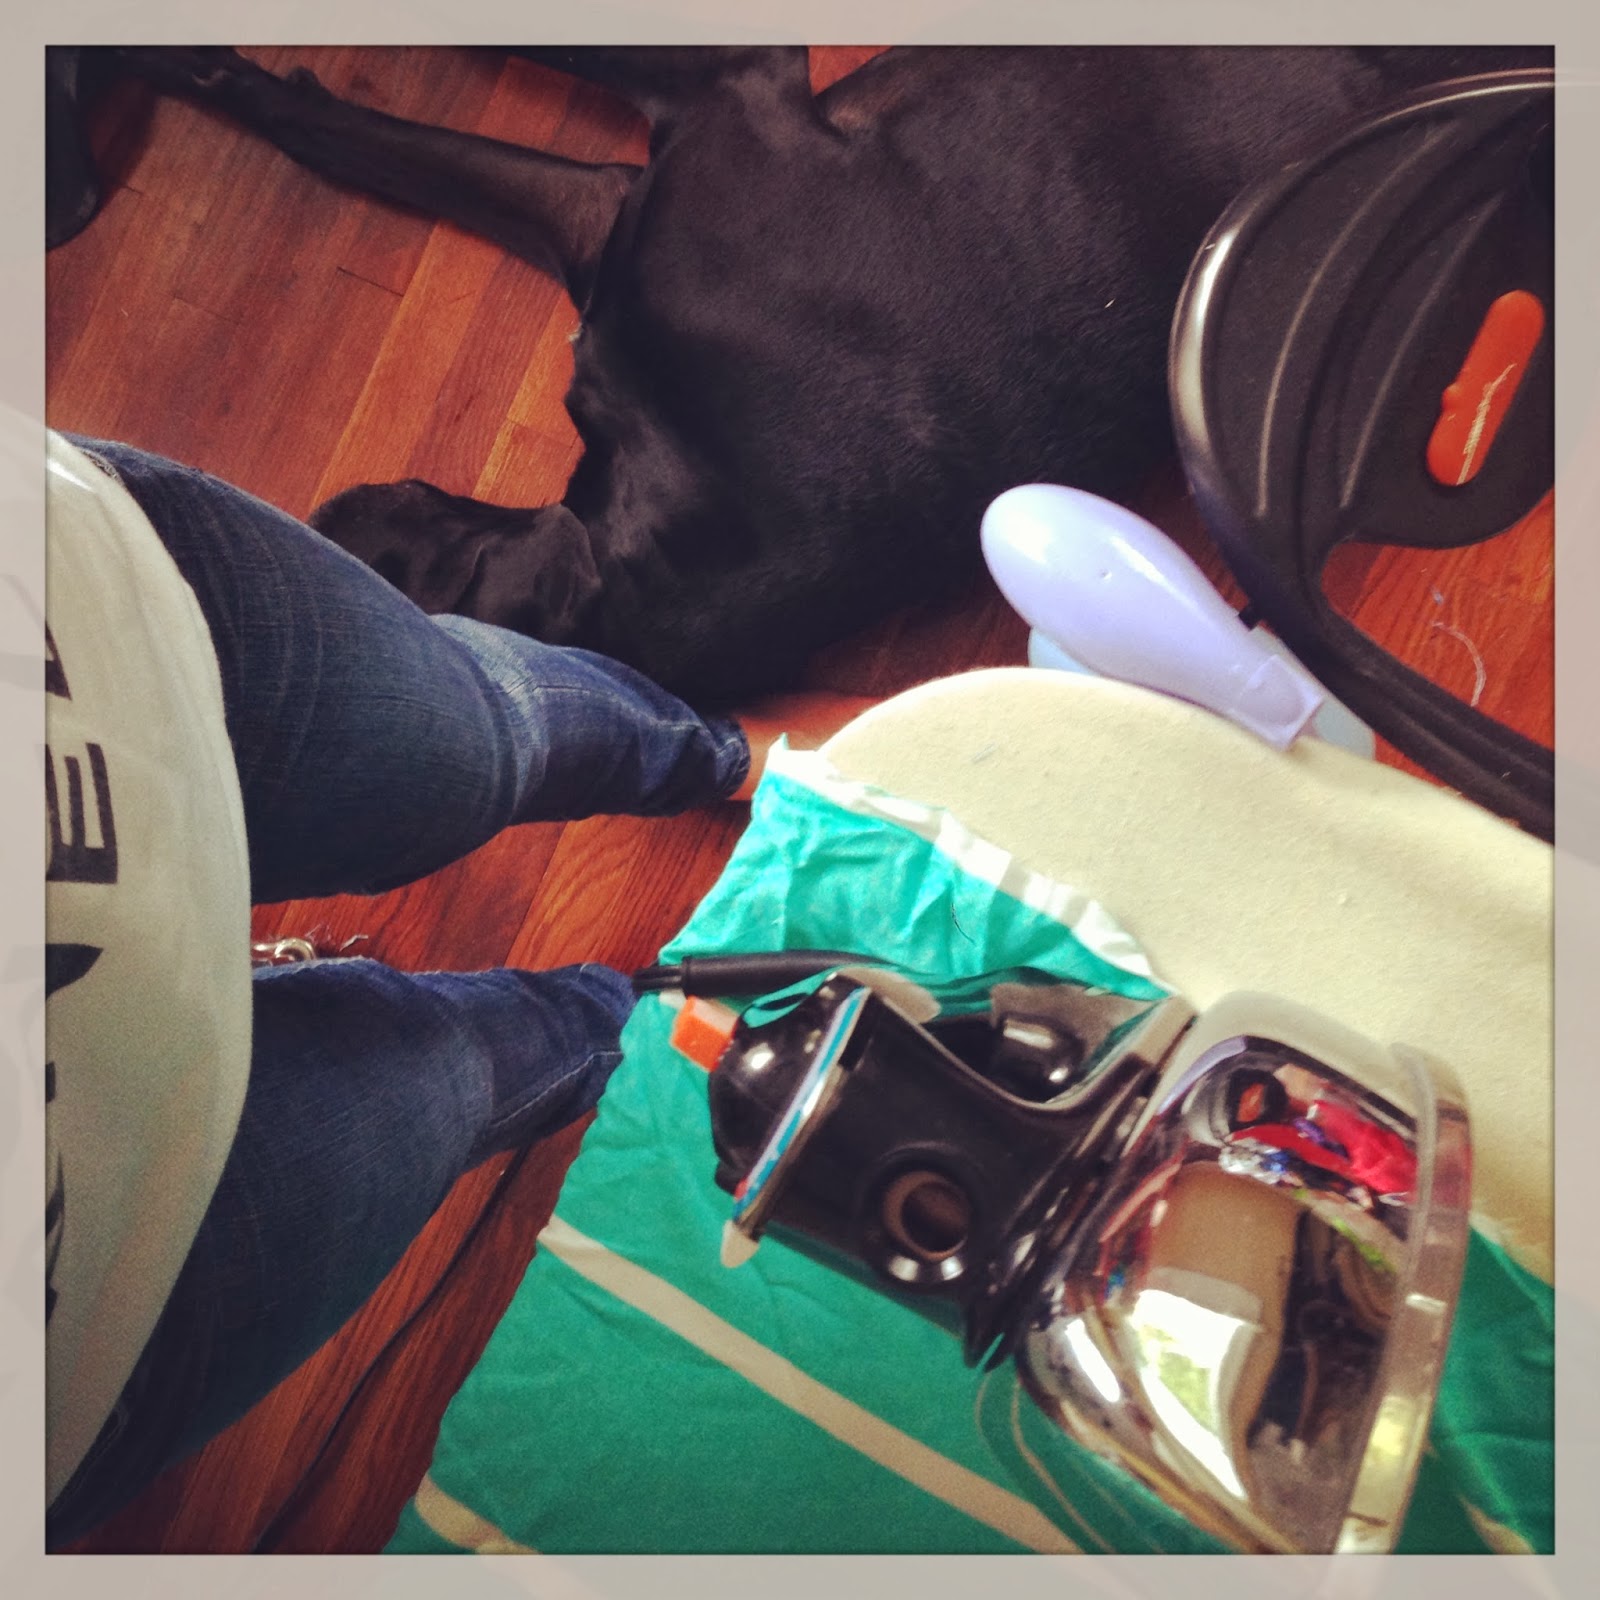
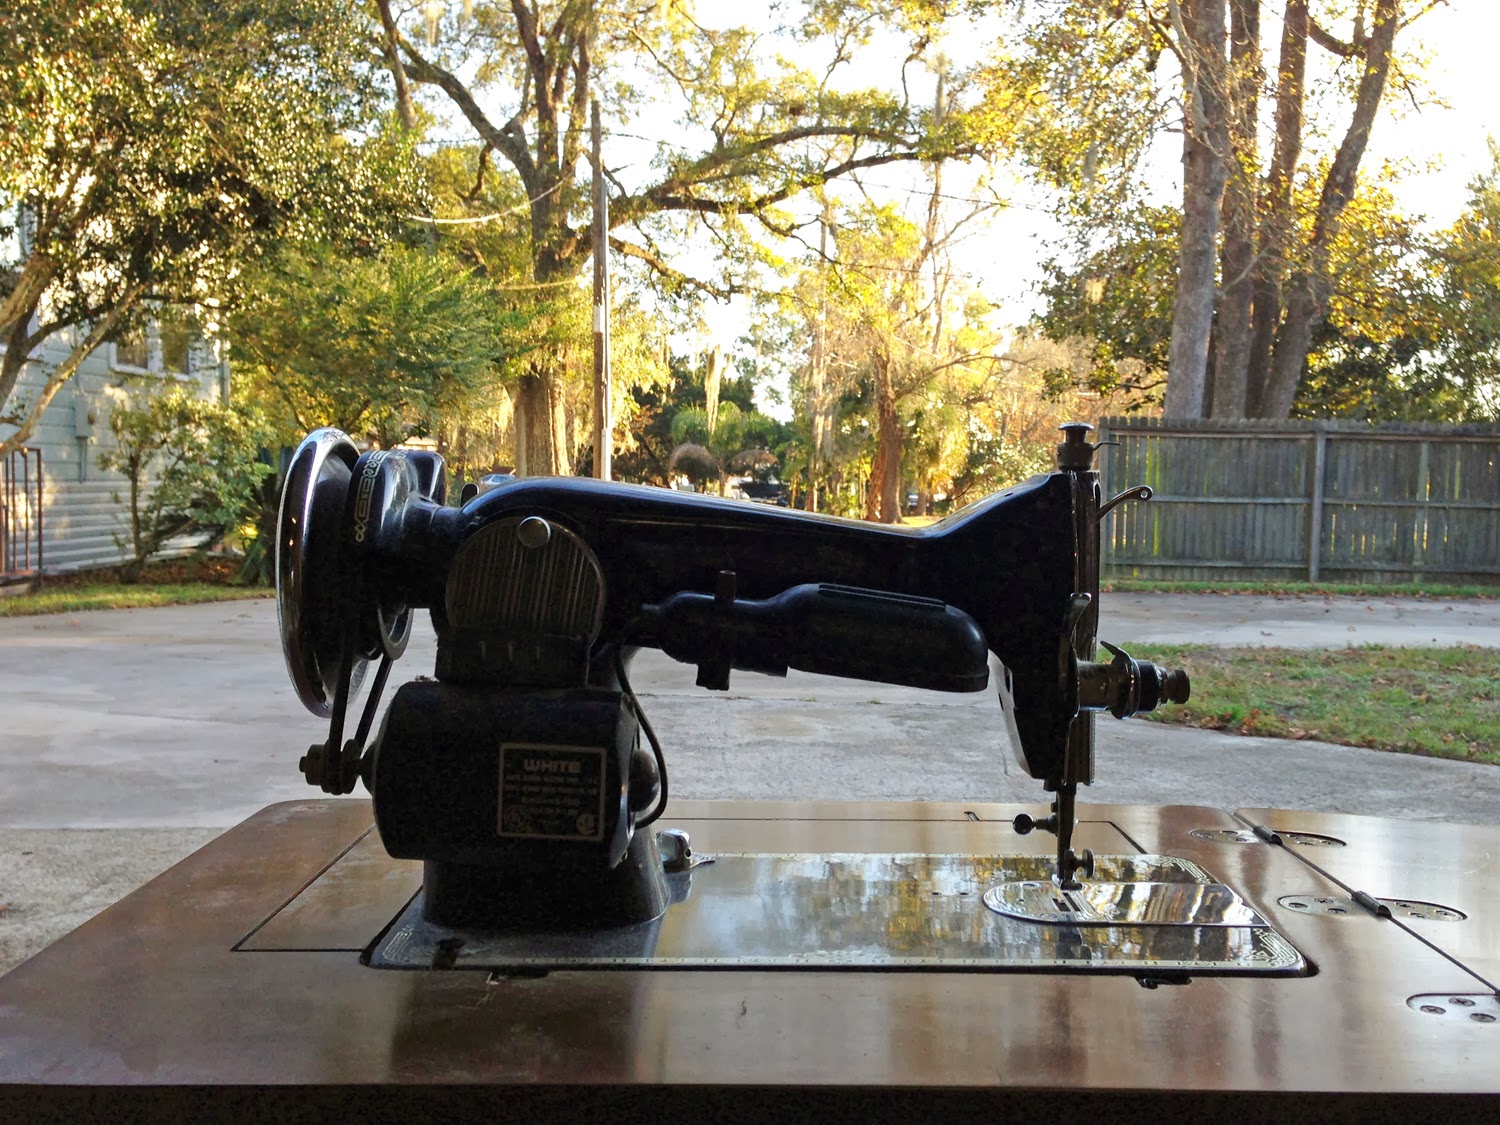
We brought her home after stopping for lunch in Riverside and a quick trip to an antique store. First thing I did was get out all my cleaning tools and sat down at the dining room table. After careful inspection and cleaning the machine, I don't think it was used much. Aside from beneath the top loading bobbin case, there was no lint from thread, no scratches, no real signs of wear and tear like my machines see. It had a bit of sun damage, as if it sat on a table for years as decoration. 


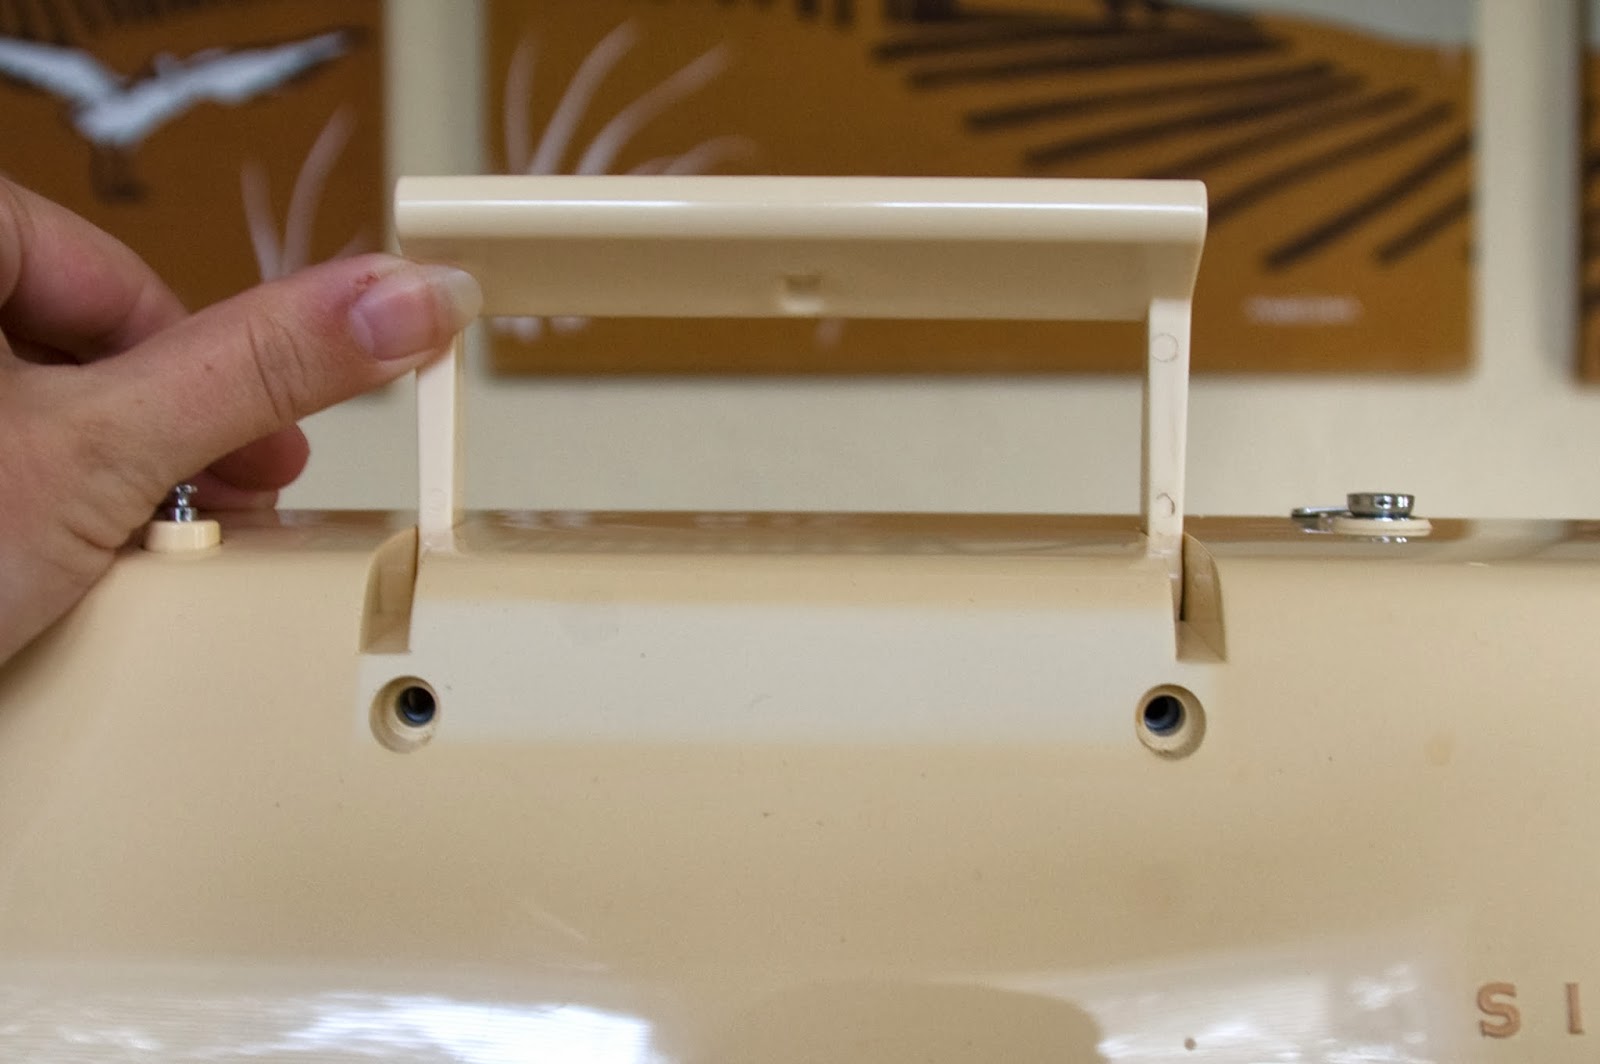
It's almost as if it was made to be the Singer Featherweight of the 70s, designed to be easy to take along. It's right around 18 pounds, pretty light for a portable machine. The cover slides on from the left side, and the pedal and cord store in that compartment, different from the usual machine, where you have to wrap the cord around the machine, and place the pedal near the presser foot. It was funny Googling this machine, and finding all the people that got a sweet deal because the sellers thought the pedal was missing. Silly, it's in the case!

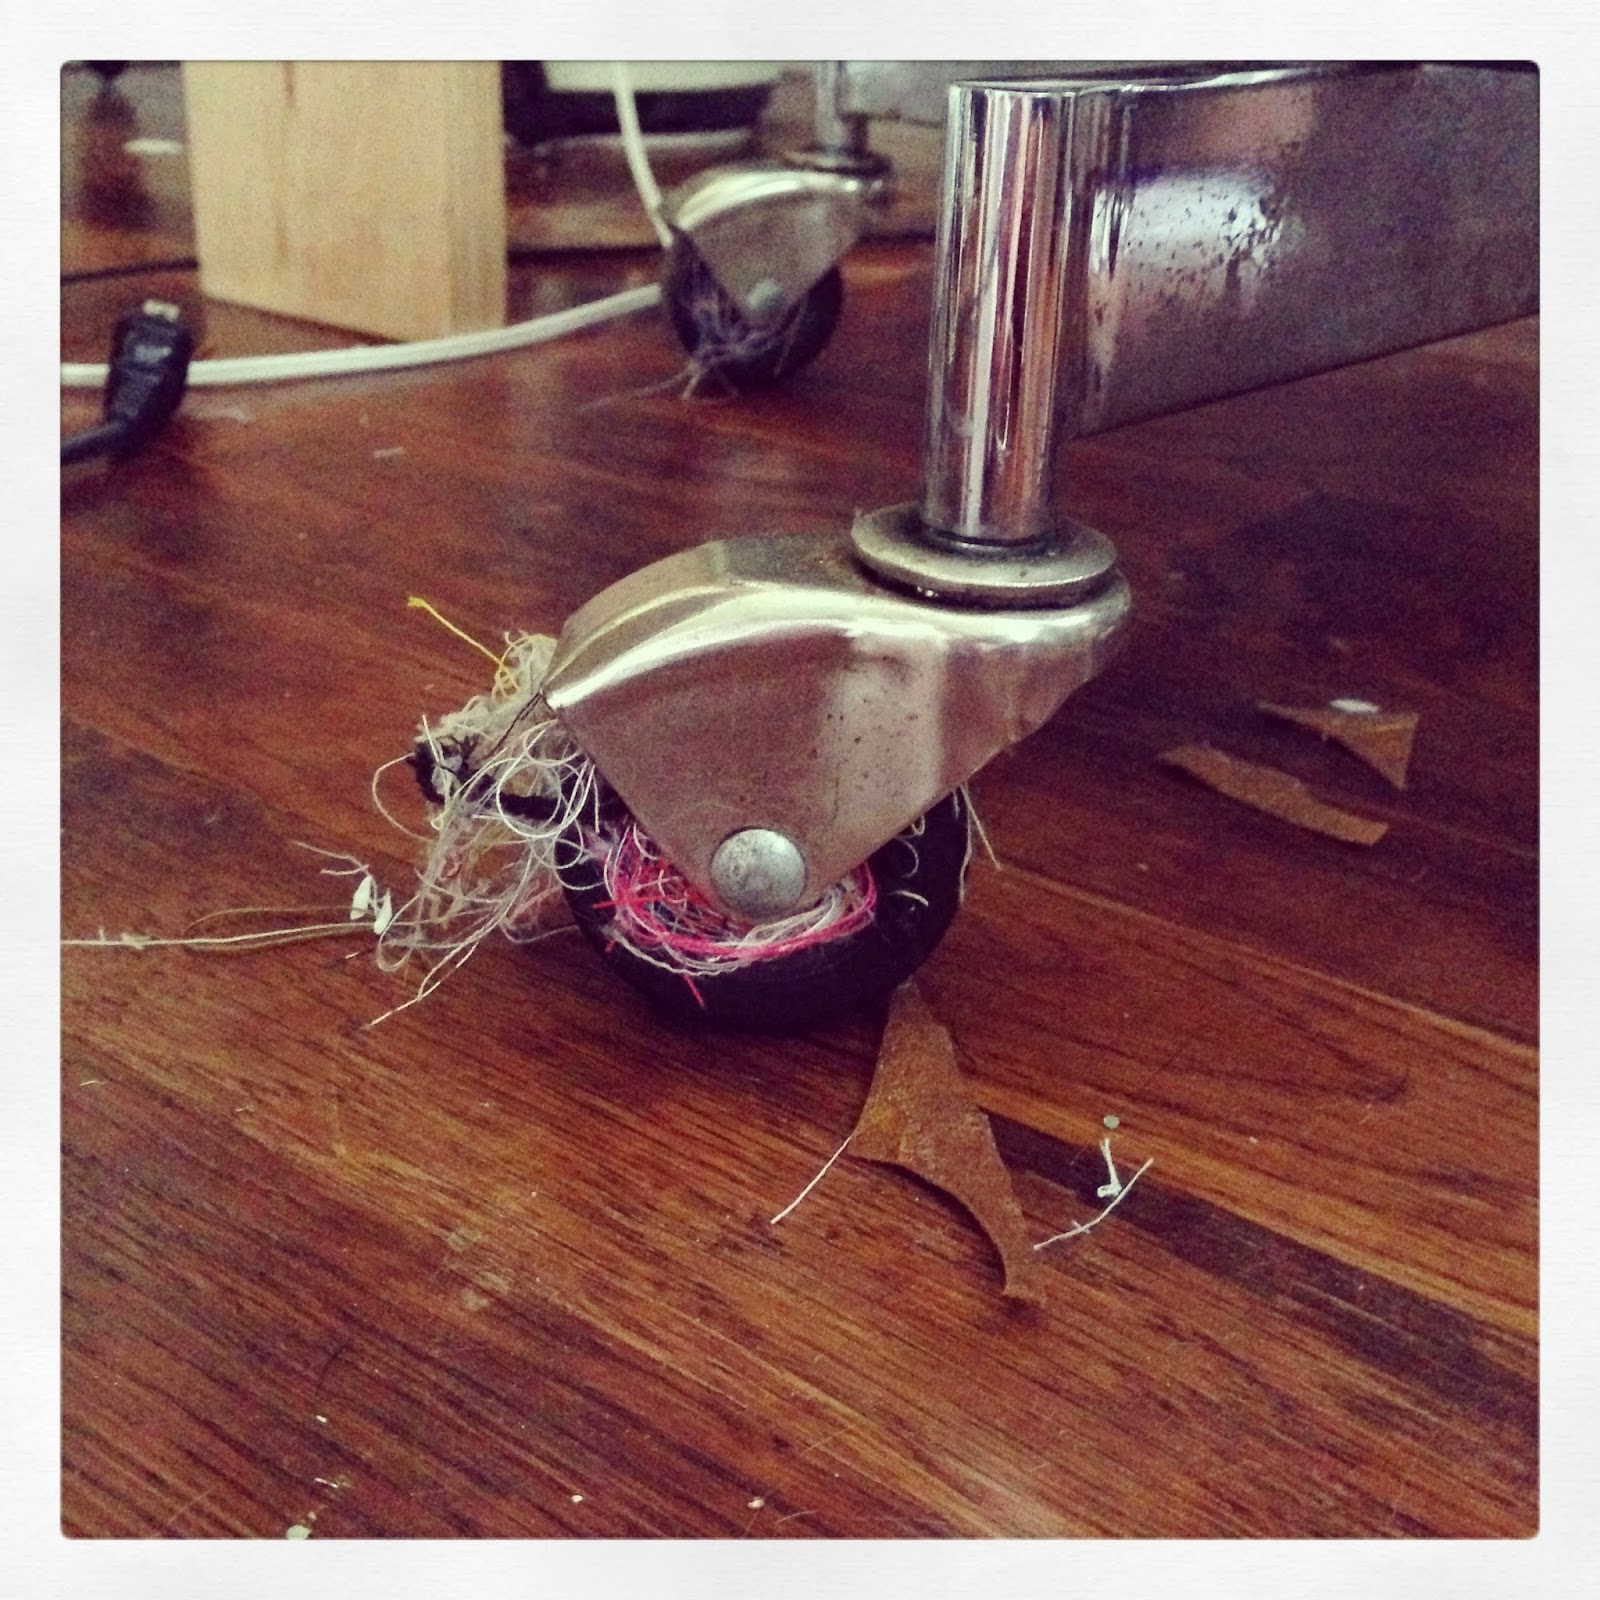
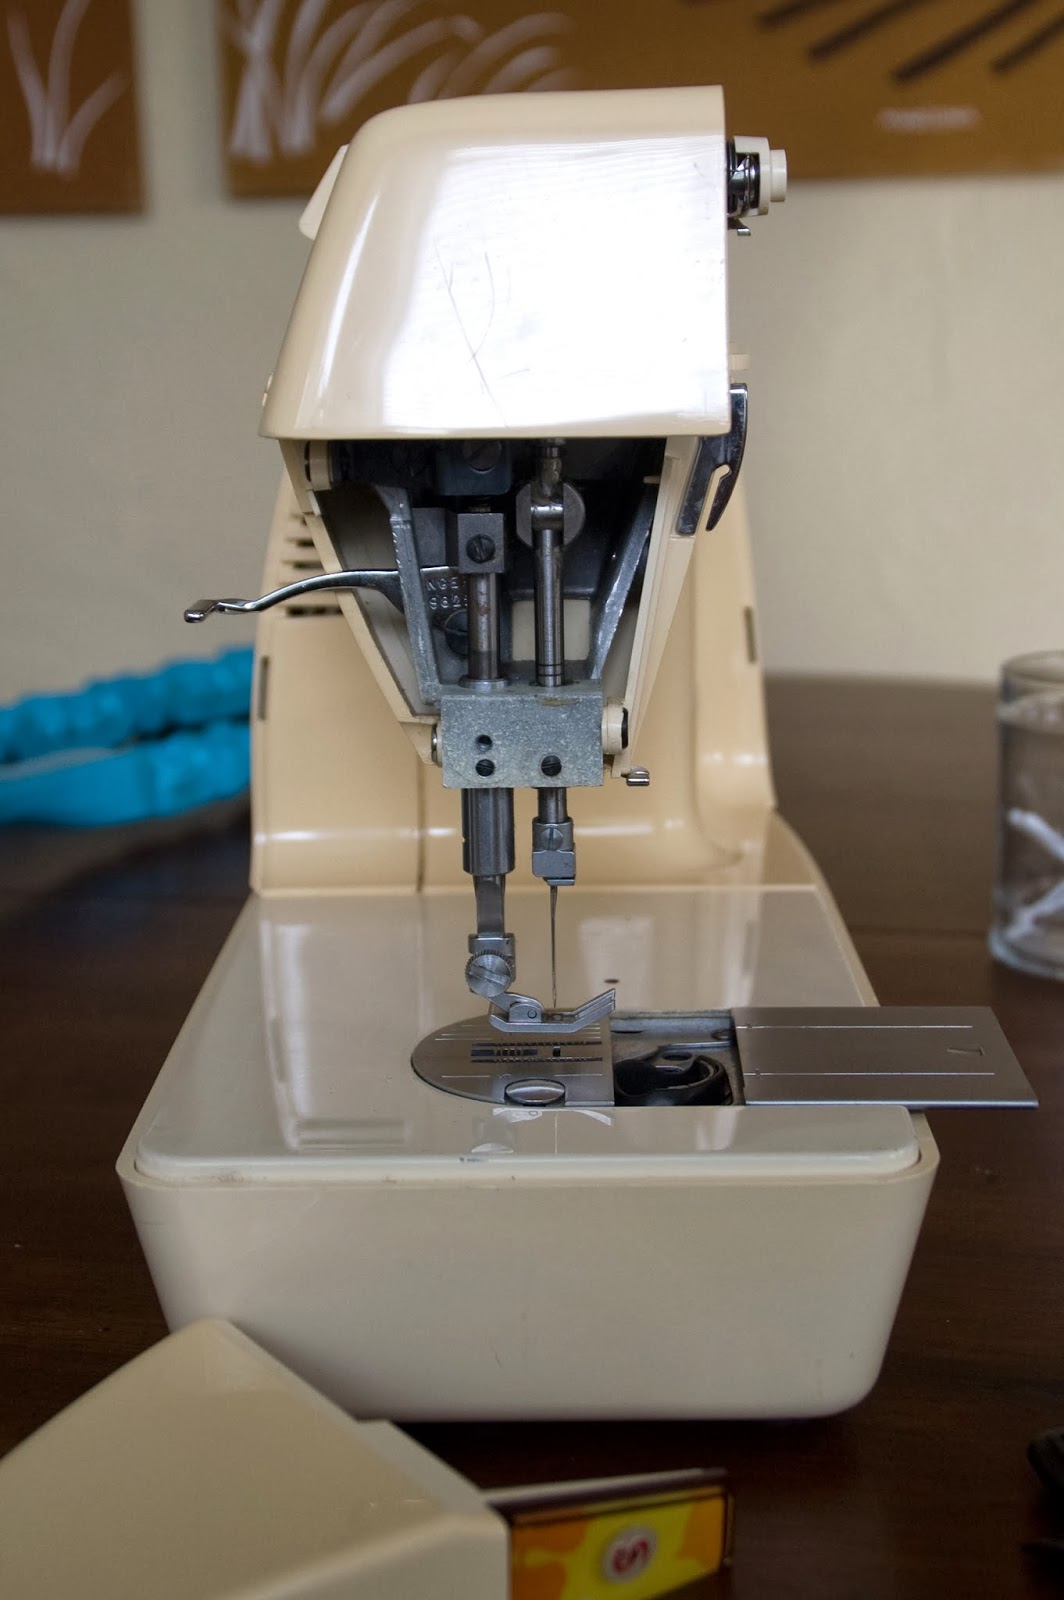
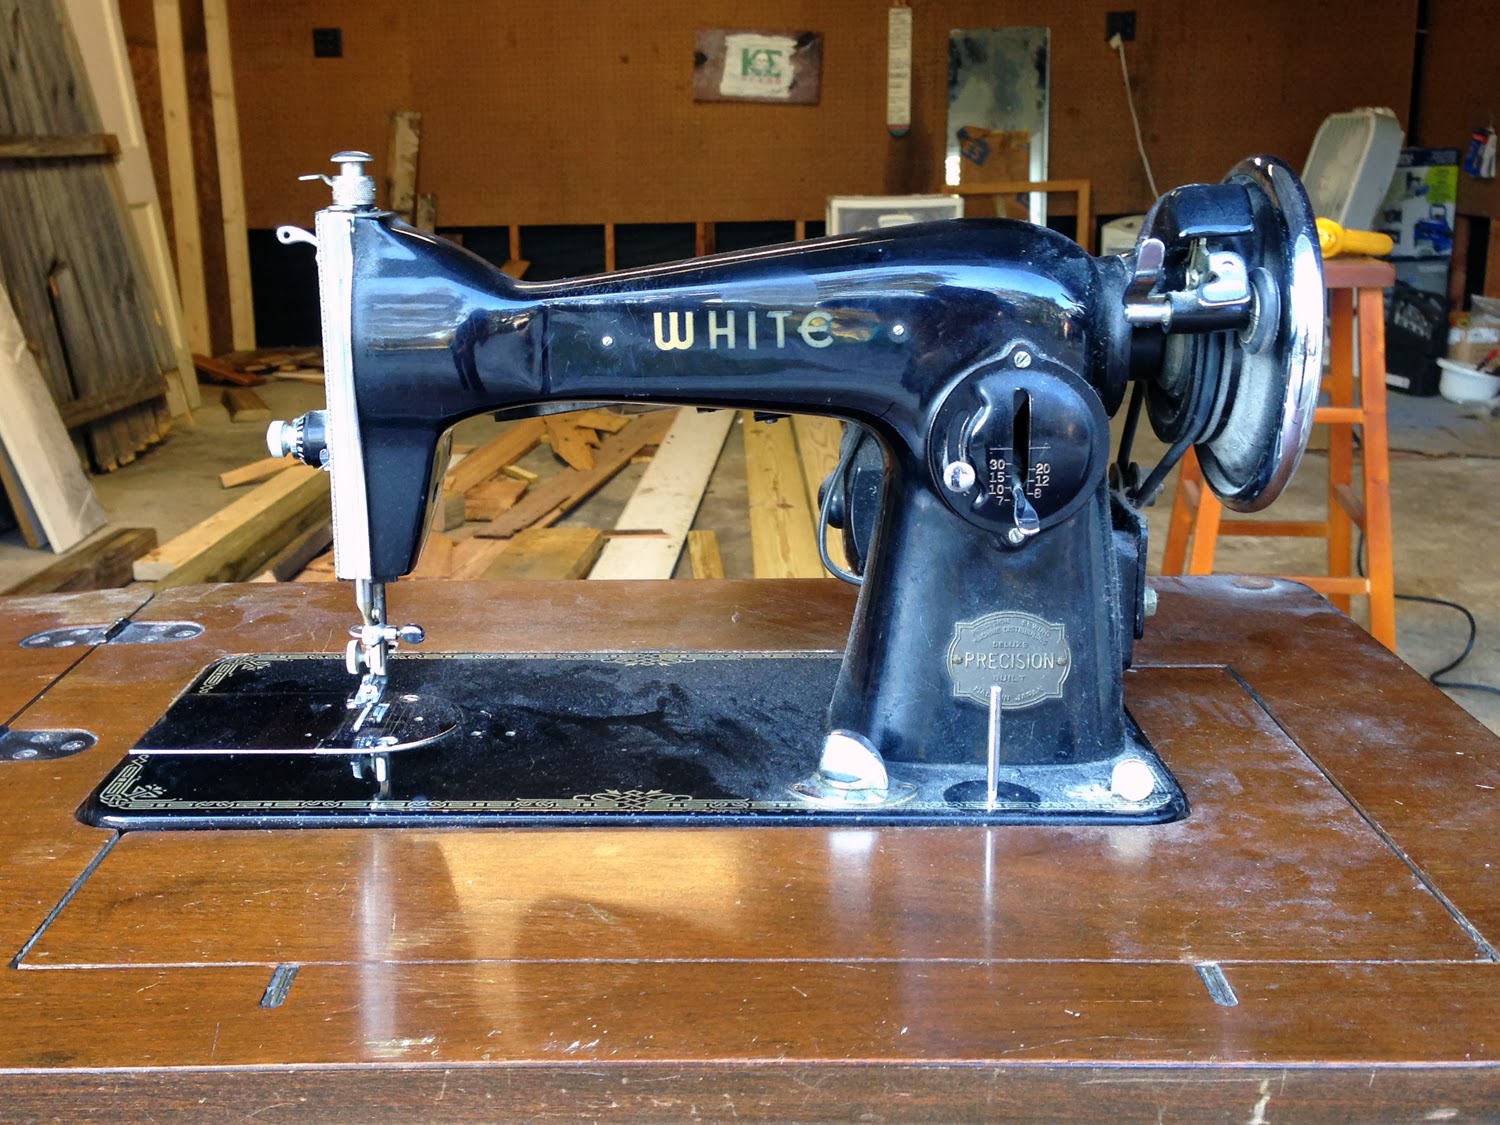
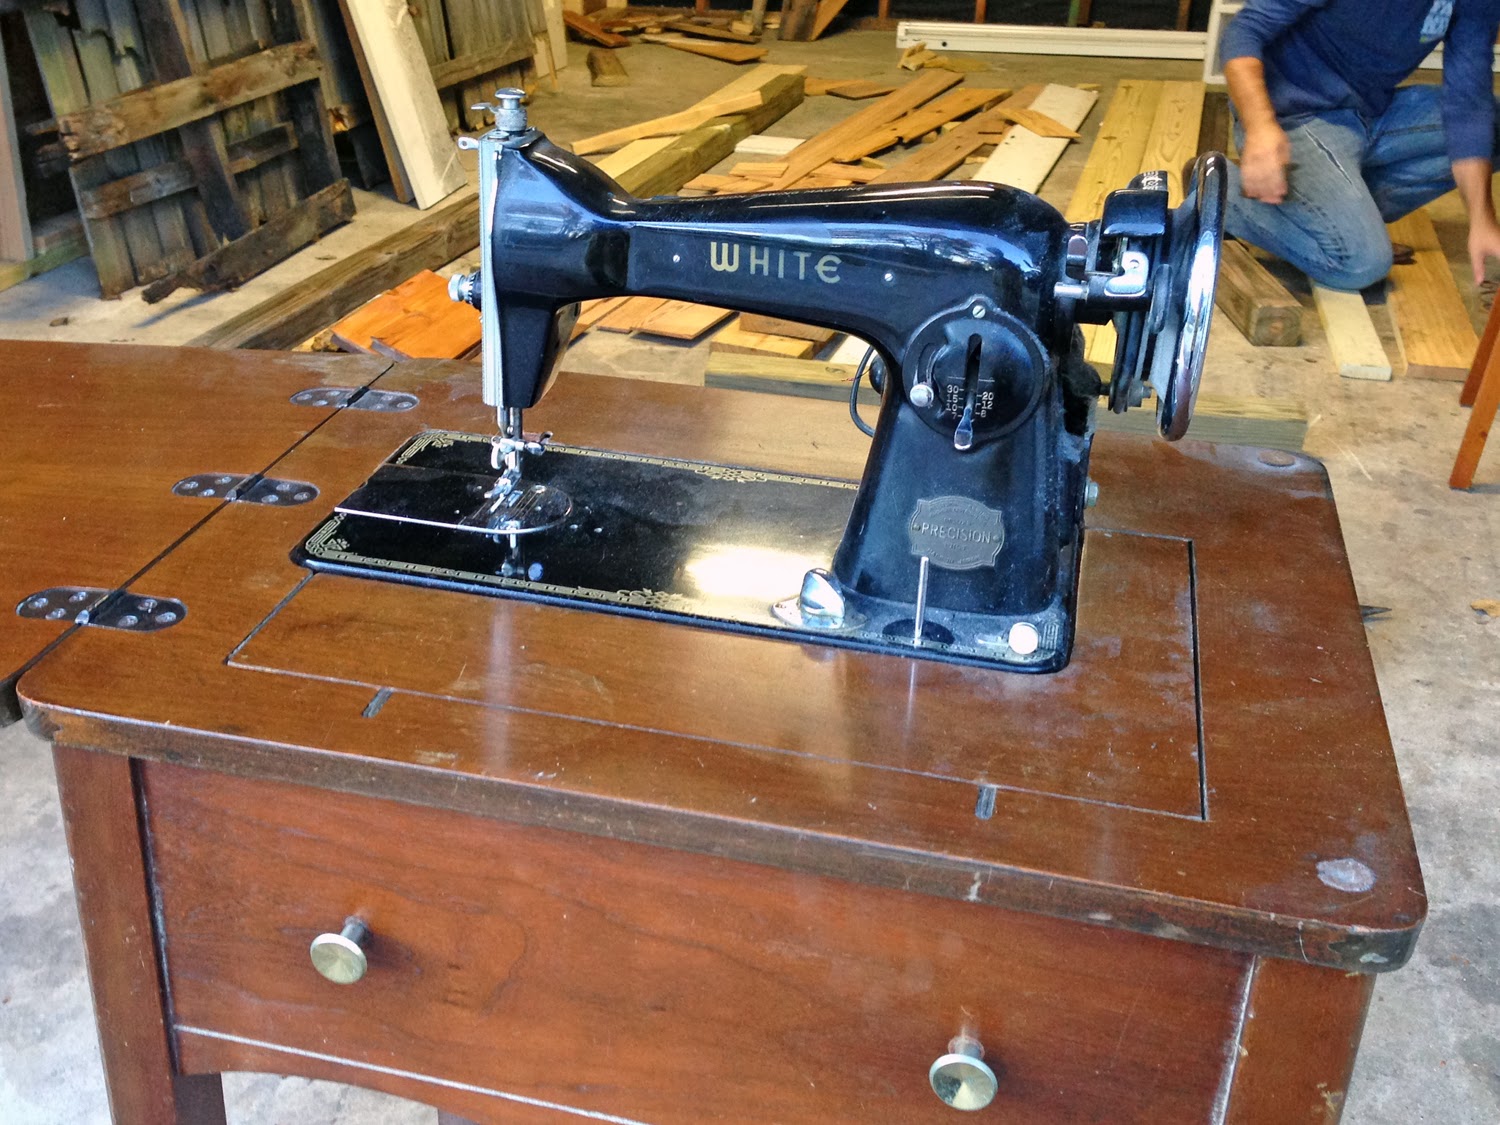
When I buy a "new" vintage sewing machine, I always take the front panels off, clean and degrease all the old sewing machine oil, and oil it again. Using compressed air, I blow away all old dust, and then put it back together. This machine didn't need anything! It was so clean, and the grease was clear, appearing to still be the original factory grease when it was made. So I put it back together, and simply blew out the bobbin case.

 
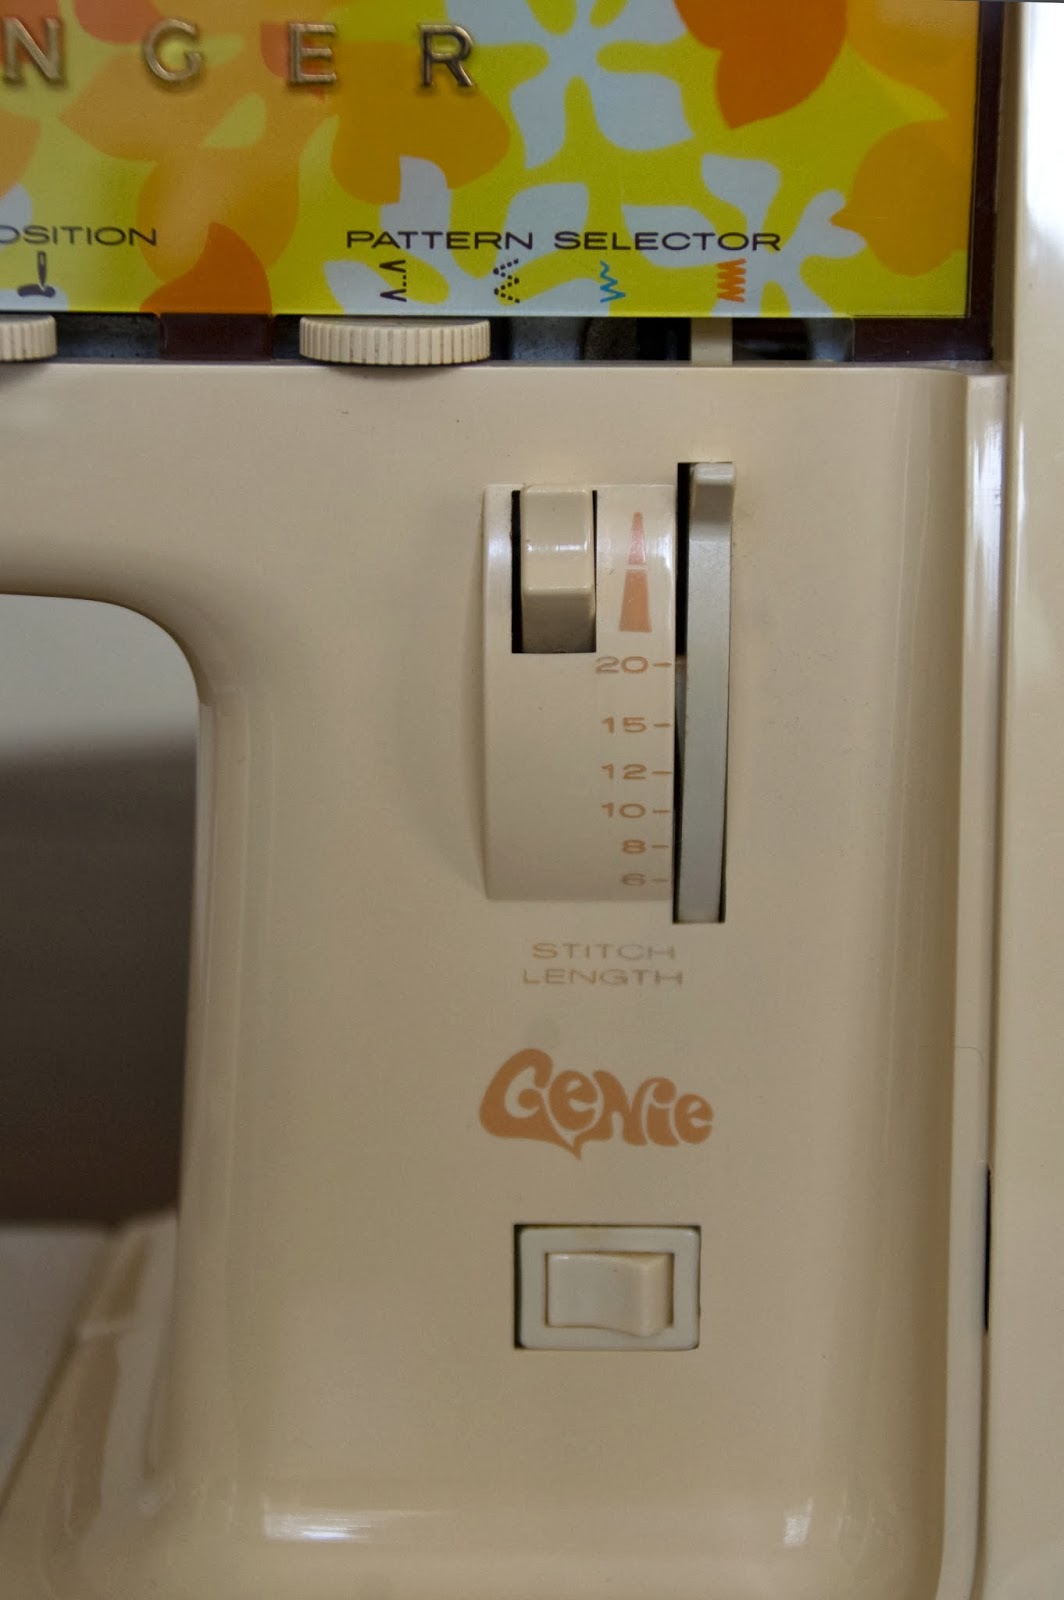
This machine was advertised to be a "portable zig-zag sewing machine" with a "new stitch function" that could sew elastic easier than all previous machines. It has so many different zig zag stitches, I can't wait to try them all! Since it didn't come with a manual, I still have a bit more research to do.


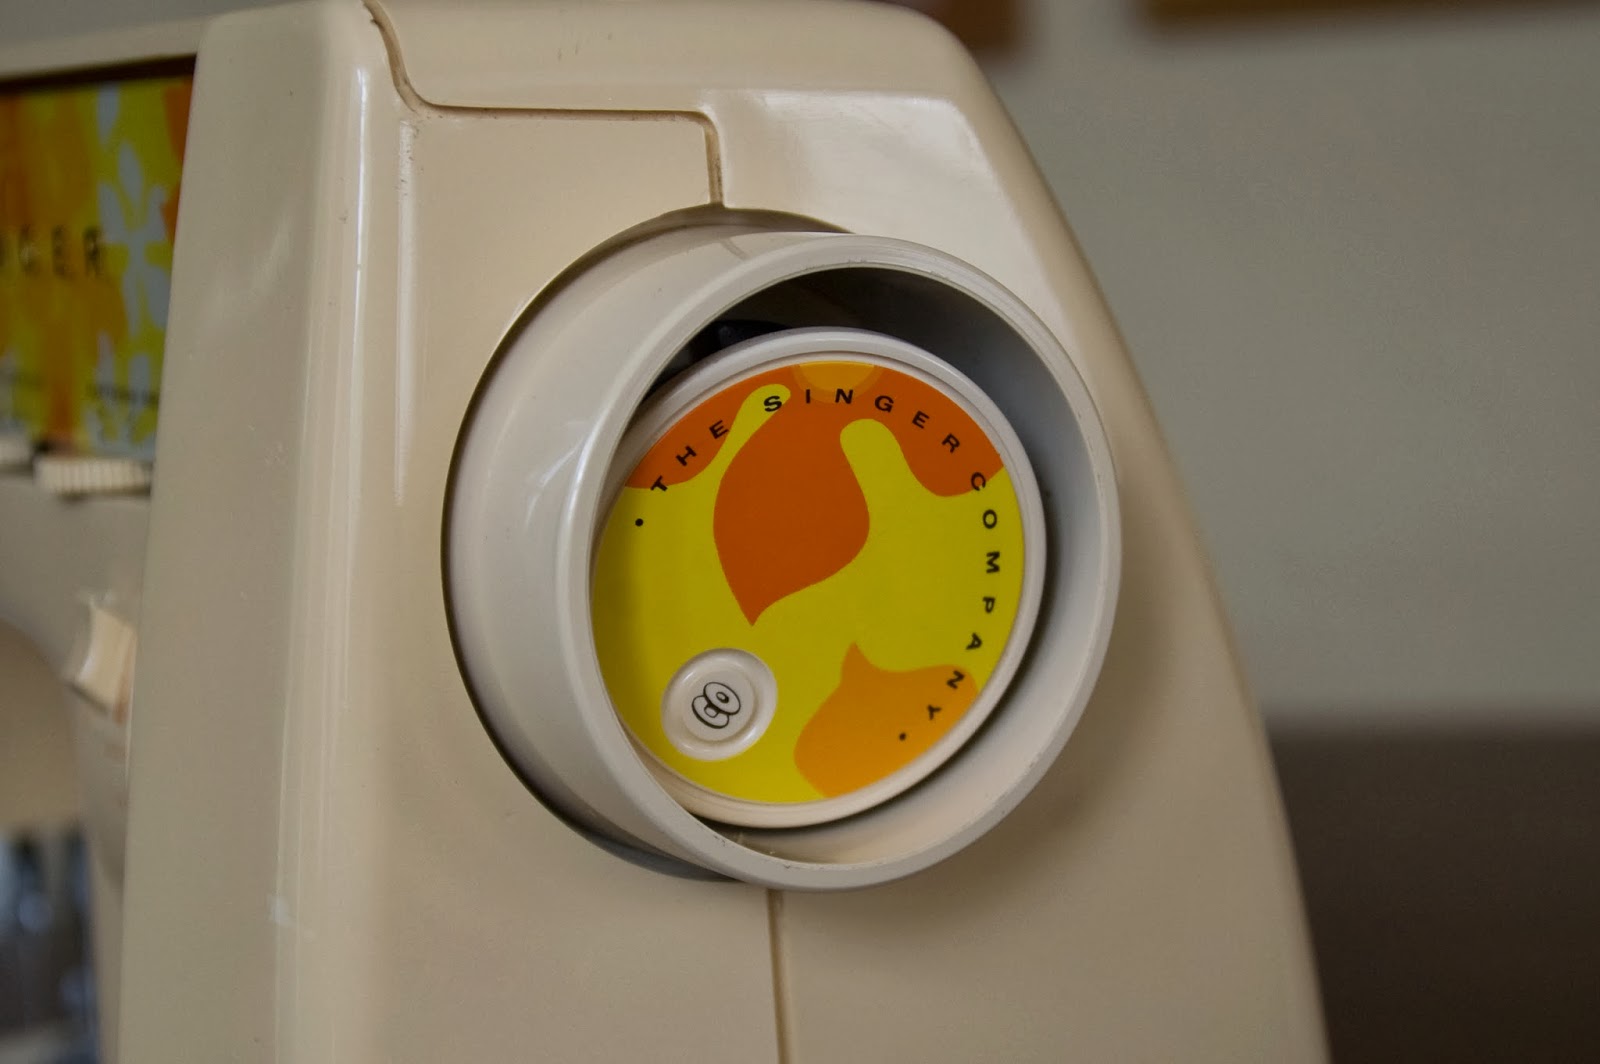
And I love the way it disengages the machine to make a bobbin. Simply press the bobbin icon on the balance wheel and you're ready to make a bobbin, turn the wheel and it automatically resets to normal to get back to sewing.

First thing tomorrow on my agenda: the post office to ship off Etsy orders, and stop at a sewing and vacuum shop for size 66 bobbins. I can't wait to sew on this machine! 

What is your favorite sewing machine? Do you prefer vintage or new sewing machines?

DIY Belted Stool

$
0
0
Want to quickly reinvent some chair bottoms or stool tops? Round up a bunch of old leather belts and let's get started. It's so easy. We started with a dining room chair when we first moved into our new home, and have yet to finish our set of four, and we couldn't resist revamping this cute little stool I fould for $1!

You will need:
  • about 10 belts for a similar size stool
  • a corded drill with a phillips head bit
  • wood screws
  • tough scissors or a utility knife
  • a second person (preferably) to help stretch the belts and assist
This part was so fun. Ripping the bottom to shreds. The frame of the stool MUST be wood. You will use wood screws to drill through the belts into the frame. The screws are simply hid on the underside of the stool.

 Starting at one side, attach a belt. Because this stool was so small, we could use each belt for two strips of belt. We created a pattern, from the outside in. Space out the belts just right, so the width of the belts leave little or no gaps showing the frame. You can predrill to prevent the wood from splitting. We used 1" screws. Also, if you want to space them out more, you can stain or paint the frame, with the gaps in the belts showing a pop of color.

Now the more difficult part. Weave the cross-wise belts through the belts attached in step two. You will have to leave a small gap between each belt. 

Like step two, plan your belts before attaching too many, so that they are the right size. Attach remaining belts, and voila. Done!

Talk about a dramatic and quick transformation! I can't wait to experiment with different color combinations in the future on different chairs!

Questions? Comments! 

The Navy Cami Collection

$
0
0
Debuting this past Saturday at Riverside Arts Market, my new mini-collection is here. And now it is available for purchase in my Etsy shop. This new line of purses I finished from just one pair of my sister's Navy uniform. A 12-piece collection of pouches, wristlets, and small, medium and large handbags. With $5 of every purchase going to the Wounded Warrior Project, it's even philanthropic!


About Petty Officer Rachael Keiser: 
Petty Officer Second Class Rachael Keiser served in the United States Navy for seven years from 2006-2013 as a CTT2, working in electronics intelligence Rachael served on two deployments to the gulf on the USS Enterprise and the USS Iwo Jima, aiding in Operation Enduring Freedom, and one Caribbean Surge, on the USS WASP. She finished her years in the Navy as an intelligence instructor at Correy Station in Pensacola, Florida. CID Unit at Correy Station named her Junior Sailor of the Year. Rachael is currently a student at the University of North Florida, studying business administration, while serving in the reserves.
My favorite part of this project and collection, HANDS DOWN, is connecting the customer to the veteran whose uniforms they belonged to, and also helping out a good cause. It's no secret that the veteran is my sister, but I think that is beside the point. It was just a matter of convenience to get my hands on her uniform since she now lives in Jacksonville after getting out of the Navy. I want to play with some green Marine camis and pair it with my burgundy faux leather. The wheels are turning! Check out some highlighted pieces below from the collection:


One of just two large bags, this one above, is my favorite. It has the front and back pockets from the right side of the pants, with the back right butt pocket having her name on them. Everyone has to have their name on their uniform, and on the navy pants, it's above the butt pocket.

One of two medium bags. The other medium bag features exterior pocket details from the left side of the pants, like the "KEISER" bag above.

One of two wristlets, with the hand strap detaching to make it just a nice simple pouch. The strap made from excess zipper.

I hope you are all enjoying your Mondays! I am working like a maniac on work, gardening, home decor, and with Matt doing video shoots. Have a great day, friends!

My Florida room and newfound green thumb

$
0
0
Welcome to my favorite place in my home: my Florida room. "A Florida room" is a closed in porch on the front of the house. Just a fancy name for a porch I guess, and I had never heard of one until I moved here and had one. It gets maximum sunlight so it is perfect for my new hobby or gardening and growing herbs. This room is where I love to spend my down time.

Never in a million years did I even think I could grow things and keep them alive! In Georgia, I had a pothos plant for a few years, but only because it required little light and I watered it every Sunday, the same day I did laundry. It was an easy reminder. Then I went out of town for a week, forgot to water it, and then messed up the schedule, next thing I know it's dead and I never came back from the black thumb. I'd kill mint. Yes. Mint. It's supposed to be impossible to kill mint but I've killed a few. 

When we found this house, I told myself this room would be the perfect excuse and push to get me to try again, and really try. My sister, Rachael, has been a huge help in cultivating my newfound green thumb. We started with a trip to a local nursery in August. I bought rosemary, parsley, and thyme. She brought me lavender and hibiscus. I killed the parsley (not enough drainage), the thyme (too much water), and the lavender is now outside and huge, the hibiscus needs to go in the ground. And the rosemary is doing great, but the leaves always curl under. I think it's too humid for it, and needs to remain outside.

Rachael comes over on most Fridays, when she doesn't have class and helps me repot plants, and gave me advice and inspiration. She is such a natural with growing things! Rachael has an apartment across town with a balcony full of plants, all strategically placed to get optimal sunlight. She even gave me a lime/lemon from her hybrid tree last week, and it was so delicious.

Rachael and I negotiated a temporary trade for the chaise, and she got a vintage rolling cart for her apartment. While Matt and I were going to build a day bed out of pallet wood and cushions, this made for a much easier, and probably more comfortable option. I'm soooo in love with it, and so are the cats hehe. Matt also built me the pallet shelf, above, for the poinsettias (they have to be off the ground since they're poisonous to the animals) and a table by the window. I love having a handy boyfriend. Next, I want a small bookshelf behind the headrest of the chaise for my books (hint hint, Matt, if you're reading this).

While the room isn't climate controlled, it makes for an even better atmosphere. It's nice and hot in the summer (I love the heat of summer). With all the windows open, a nice breeze rolls through that makes it perfect to just relax. It's especially lovely at night. And in the winter, it's cold but not too cold, and I can't wait to stay curled under a blanket on the chaise and read a good book with hot spiced cider.

We've lived in our home for about six months now, and it's finally looking like we live here. With Matt and I merging our two households a few years ago, and then moving to a new city and state, we're still in that phase of getting the right decor and accent pieces to make our house a home. Pillows here, a wall hanging there. I have a list as long as my arm of things I want to change and fix and make. I'm trying to go out of my comfort zone and try new things that aren't in my instinct as far as decor.

Next step: more holiday decorations! We're saving the majority of our Christmas lights for Shelby this weekend, for Holidazzle, then we're decorating the rest of the house. I can't wait! 

My plants! It's a miracle! I'm growing things from seed! We're laying out the plans for a large outdoor garden, and we're getting the plants ready. Matt bought 2x4s for a large box raised above the yard, in the side yard, away from Zeus' normal running zone. Thankfully our yard is huge, more room than we can handle. I can't wait to have food that I've actually grown! We're planting peppers, tomatoes (roma and beefeater), mint, carrots, basil, rosemary, cucumbers, broccoli, and more. Matt did some research to find what plants can grow in Florida during the winer, and they just happen to be the veggies we eat most! Talk about living in the perfect place.


I'm so thankful for this little addition to our home. Sometimes working from home really bogs down my brain, making me a crazy manic workoholic. This room is my down time. My unwind time, "Sally-time". I don't take work into this room. I just sit, look at the plants, read, snuggle with cats. It's peaceful.  Now time to go check on my seedlings and water them all. 

I hope you enjoyed this little peek into my 'home'. Do you have any gardening tips you'd like to share? I'm so new to this, and can't wait to learn more. Propagating is next on my list. I'm trying to cultivate new lavender plants from my giant bush, so far with little luck. 

Giving back during the holidays

$
0
0

This holiday season, while we are all getting wrapped up in buying things for friends and family, planning dinners and travel arrangements, and making lists of what we want for Christmas, why not take a step back and think, "what can I do to help someone this Christmas?" What skills and means do you have to help out someone?

I'm trying to do just that, using my skills for good, in collection sewing machines that aren't being used from friends and local people, service them, clean them up, and act as middle man, getting the machine to someone in need of one. Someone who is going through therapy where sewing helps motivate them and build back up their self worth, make their Christmas when their family can't afford to buy them a machine, and so on. In essence, I'm serving as the middle man, collecting funds, servicing machines that need attention, to get them ready to be used, etc. 


Back when I used to have 8 machines, I surprised a young reader who didn't have a functioning machine, and mailed her one of mine. She was over the moon grateful, and it made me so happy and warm inside, knowing that I unselfishly helped out another person. After purchasing a machine on Craigslist recently, I got to thinking. I then placed an ad on Craigslist for those wanting to get rid of a machine for a good cause, I could help that machine find a new home. 

Within a few days, I was contacted by the local women's center here in Jacksonville, and found a person in need. Without divulging details, this gorgeous barely used machine, pictured, was sent to me from a friend that didn't need it anymore, and I will hand it over next week. When I opened the box this morning, my heart swelled and I teared up a bit, overwhelmed by the generosity I've seen since starting this little cause.

Working with the local women's center, and by placing local classified ads, I'm going to continue to do my best to help out whomever I can. So, if you have a machine you'd like to donate, please email me at sallyannfashion@gmail.com and we can work out the details. Want to donate cash to help pay to service old machines that are donated and in disrepair?, email me. If you are in need of a machine, email me. 

Happy holidays, friends

Repost: DIY Tacky Holiday Sweaters Perfect for Fur families!

$
0
0
***THIS BLOG POST IS ORIGINALLY FROM 12/18/11***

It's that time of year again -- tacky sweater time! Instead of rifling through thrift store rack in a hunt for the best vintage sweaters, Matt and I decided to make our sweaters this year. We made the best sweaters ever! Each of our sweaters had our animals in Santa hats, complete with jingle bells. And nothing makes the holidays more enjoyable than couples crafting activities!

The idea came to us when we were playing Scrabble on my coffee table on Monday night. It was like a giant light bulb when it came to us and I don't even remember which one of us spoke and said it first, but it was one of those mutual throughts and "ohmigosh" moments. I decided to put my cats, Clementine and Stella on my sweater, and Matt put his dog, Zeus, and cat, Mike, on his. 

To create a similar sweater with your animals on it, you will need:
  • Photo transfer paper, we used Avery Inkjet Light Fabric Transfer Paper.
  • White fabric, we used scrap banquet napkins
  • 1 large Santa hat, I bought mine at Salvation Army for $1
  • Red sweaters, I got mine at Salvation Army for $3.49 and Matt's for $1 at a locally owned thrift store.
  • Scissors
  • Iron
  • Hot glue gun and glue sticks
  • Jingle bells
  • Matching thread
  • Fray Check (optional)


Start with high resolution photos of your animals. I found it best to use photos where the animals face took up most of the photo. In photoshop, I used the "lasso" tool to take just the face from the photo, copy, and paste into a blank letter document in photoshop. This step is very important: FLIP THE IMAGE HORIZONTALLY! Because you are ironing on the transfer, it will be mirror image of what you print on the fabric. Had I not done this with Stella's face, she wouldn't look like herself.

Preview (also very important, because the paper is expensive and you don't want to make mistakes). Now print. Cut out the face from the paper and place face down on fabric. Follow the instructions that come with the paper. Be sure you DO NOT use steam. Allow fabric to cool completely and remove paper. What you peel off will resemble parchment paper.

Your animals face will be on the fabric! Cut out from the fabric, using fray check on the edges if desired. I left a tiny white edge to make their faces appear more bold against the sweaters. 


Position the faces where desired on the sweater and pin in a few places. Sew the faces to the sweater. This can be tricky for a novice seamstress, as the sweater will want to stretch and move and the transfer will not. The feed dogs (the metal grooves that feed your fabric through the machine) will push the sweater and the transfer will stick a little if not careful. Take your time with this step. You can release the tension on the presser foot. This knob should be at the very top of your machine, in line with the shaft and needle. This allows you to move the sweater with a little more ease.


Matt shows Zeus, Zeus.


Matt helped with the next step. Take your human sized Santa hat and cut out triangle for the hats. Fold over the long edges and sew. Matt was a quick learner on my sewing machine. I left him alone and he did so well. I was thoroughly impressed. My boyfriend has talent!

After sewing the raw edges of the hat, attach the white furry trim along the short side of the triangle. 


Position the hats on the sweater as desired and hand sew. I used clear nylon thread but I do not recommend it because it is SO hard to see and is very frustrating when sewing by hand. I switched to red and white thread by the time I got to hand sewing on my sweater.

Using a hot glue gun, glue the pompoms of the hat to the tips of the triangle. Place a piece of cardboard behind the part you are glueing or you will glue the back of the sweater to the front. Adorn with jingle bells, bows, trim, maybe even puff paint with animal names of a nice greeting. And you're done. Time to party!


With our friends at the "tacky sweater" party.


Matt and I. We looked so awesome together. I would be in conversation with a friend, then look down or at Matt's sweater and bust out laughing. It was so comical to me. And they were a huge hit amongst our friends. Not to mention the noise we made walking around. Jingling everywhere we went!


Love this picture of the two of use, or is it of the six of us. Hmmm..

Hope you all enjoyed my tutorial of these DIY holiday sweaters! They turned out so amazing I can't wait to wear mine again this week! If only I can convince Matt to wear his again... we'll see.

Matt and I are relaxing on our Sunday evening with a pot roast in the Crock Pot and the much anticipated Patriots/Broncos game on the big screen. Look at me, knowing NFL teams, Matt's rubbing off on me. Happy holidays! I'm finally getting in the Christmas spirit. I even bought Egg Nog today! 


***THANKS FOR READING! HAPPY HOLIDAYS, Y'ALL!***

Sewing machine restoration project: my new vintage White

$
0
0
Meet Betty, Betty White. My newest addition to my sewing machine collection, a vintage White. Purchased for only $15, it was a steal. One problem: there are no cords, no foot pedal, no electrical plug. Time to start researching and brushing up on my electrical skills.

It's not terribly difficult from my understanding. With the motor on the outside of the machine, it's a matter of opening up the case, and using connectors to hardwire the new electrical. And with some turtle wax and elbow grease, it's going to shine like this similar machine.

It will be a fun project to restore it by rewiring all the electrical and polishing up the machine. Matt is in charge of the cabinet. Since a lot of it is wood veneer, he has to be careful not to sand it too much, and then stain it again, maybe a lighter color or even a color stain. I see a light blue stain being quite beautiful. I photographed it as is, as soon as I brought it home, dust and all.

Hopefully it will be functional when it's restored. The hand wheel turns with ease, which is a good thing, and there is no rust or cracks in the machine. It is missing the spool pins on the top, where the thread sits. I'm hoping I can find replacements for those parts.

I used to have about eight machines, and now I'm down to four, this White makes five, six including my serger. Even if I don't sew with this machine, it's a beautiful piece, and a great way for me to hone and improve my skills. And it's something fun for Matt and I to work on together. He loves to work in the garage on woodworking, as you can see by all the scrap wood in the background of the photos. We have a blast trashpicking scrap wood and making new things with it. 
The knobs on the front will be changed out to crystal knobs, or possibly shiny black. What do you think?

Using this model in search engines, along with the serial number, I hope to find the exact date this machine was made. My best guess, early 1950s.

And the feed dogs still drop with this switch on the front. Maybe I'll get some black paint, and touch up the chips on the front, too. I plan to blog about the entire process, so be sure to check back and follow along with the restoration.


Next step: clean and remove the machine from the cabinet. More soon!

Christmas recap!

$
0
0
How was your Christmas? Mine was fantastic and I want to share pictures with you! Matt and I had originally planned to drive to Michigan to see snow and my family, but long story short, it didn't work out, so we drove a few hours north to good ol' Augusta. Matt's family is there, and we had a blast!

I spent three and a half year in Augusta, Matt around six. We moved seven months ago to Florida, so it's still a little odd to return, with that lingering feeling of home at certain spots of town. But so much has changed. I catch up with what friends I have time to, when I'm back in Augusta, but it's always a time crunch. 

Two and a half days there, it was such a great time cooking, laughing, eating, and enjoying each other's company. Matt's niece and nephew were a hoot, as they always are. It's fun to watch Zeus interact with small children, and he's a sneak at getting food from their tiny hands. It felt like Christmas, and that's what matters. Merry Christmas and happy new year, y'all. 


New Years Eve is tomorrow, and it's blowing my mind. I have wayyy too much to do before my shop relaunch later this week. 

Until next year!

The Cutest Kitten In The Basket

$
0
0
Meow meow. Here's a little behind the scenes look into the construction of a weekender tote I made this week. I found this cat rug/wall hanging at Goodwill a few weeks ago and almost jumped out of my shoes. Best score of the week! It was a little big, and I knew I didn't want to cut into the width of it at all, so the design wraps around to the back of the tote. I upcycled straps from a tote I cut up for faux leather, and the bag closes with a magnetic clasp.

For other bags like this, check out my Etsy shop.


Behind the scenes: Cut Here Limited Edition Handbags

$
0
0
Available soon in our Etsy shop, this Cut Here collection is geared towards the handy ladies out there. The ones that make things with their hands. That have more calloused hands than their other half, that express themselves by creating things. Hair stylists, seamstresses, designers, crafters, and more. 

Something about fabric with printed scissors drew me in, and next thing I know, I have a stock pile of 6 different prints. Brown, black, blue, red and teal. Purses will be listed as they are completed, so keep checking back. Back to my work I go, with Doctor Who playing in the background, machine in front of me, that's where I'll be until further notice.

Custom orders available. Email me at sallyannfashion@gmail.com for details.

Surprise Kitten Handbag

$
0
0
The cat lady in me can't help but show off this new handbag to you all. Made from an old wall hanging that my sister, Rachael, bought for me years ago, this handbag is truly one-of-a-kind. 

This wall hanging was so big, I had a very difficult time wrapping my head around how I was going to make it into a useful handbag, not just a tote. I started by removing it from it's wood frame (see this post for an example) The wall hanging had a small hole next to the paws of the cat, so I clipped a small piece from the bottom of the print, and used stitch witch and zig zag stitching to patch it. 

I decided that I'd keep the wall hanging as is, and make a wrap around handbag, with a fold over design. It took some calculating to figure out the zipper and attachments for the straps, but I'm so happy with the way it turned out! Whatcha think?!


Using scraps, it even has a matching pouch that comes with it! Available for purchase here.

Market Days at UNF

$
0
0
Shelby and I are back to work in full swing. With 2-3 pop up stops a week, sewing machine in tow, we're going to dominate this year! We started off with Winter RAM, like the normal Arts Market we do every Saturday, but considerably smaller because of the winter weather. Ha. Florida winter weather is so funny compared to my native Michigan. I worry about my seedlings in my Florida room when the overnight low hits 37, but my family is dealing with 10 degree highs and 12" of snow a few days a week. Wind chills in the -15 range. I count my lucky stars that I'm a Floridian now. 

No joke though, Florida cold is COLD! The humidity isn't just an excuse weak southerners use during the winter months, it is quite chilly. Like down to the bone chills. But once the sun hits, you can't complain about being able to wear a light cardigan and beanie. That's my wardrobe from now until spring. Skinny jeans, slip on ankle boots, a baggy top, and an infinity scarf made by yours truly.

I've been sewing like a maniac, with all kinds of new work up for sale in my shop. For the time being, small accessories that are $10 and under won't be available for sale in my online shop, just on location at University of North Florida Market Days, and Saturday RAM. I'm working on a spring festival tour, and will post the dates as soon as they are confirmed. If interested in headbands, hair bows, or other small things purchased from me in the past, email me for a custom order. 

My favorite part about Market Days at UNF, I sit and sew all day. Most vendors on college campuses stop the kids walking, hand them stuff, and try to grab their attention. I don't have time for that. I'd rather sit back and work, and let people peruse my wares and what not. Yesterday, I even had a little sewing lesson with a student, and let her make an infinity scarf from fabric I had in my tote bag. Such fun. 

My night eating Twinkies with the Blue Man Group

$
0
0

It’s my first time seeing The Blue Man Group, and I’m not sure what to expect. Going in, I’m thinking there will just be three blue men, a light show, a lot of percussion, some awkward moves and blank stares at the audience. 
My date, Matt, and I find our seats about 20 rows back from the stage; I’m sitting along the aisle. The show begins with the Blue Men banging on drums with splashing paint. They’re throwing paint balls at each other, catching them in their mouths and spewing the paint back out of their mouths. OK, so pretty normal so far. 
In only 45 minutes, they’ve started throwing things at the audience, playing with giant iPhones and playing strange, industrial-looking instruments. Then, the Blue Men change it up. They’re walking through the crowd, literally, on the back of seats and atop arm rests, placing their hands on audience members’ heads to balance. And they’re heading my way. 
Two rows in front of me, a mother and toddler giggle when all three men stop to stare at them, perplexed and awkward. Suddenly, I look up and all three are staring at me. I am confused and unsure of their next move, but before I can think about it any further, they continue on, heading back a few rows and continuing with the awkward blue-eyed stares. 
I'm intrigued to see what happens next, and just when I think they’re headed back on stage to bang on some more PVC trombones, they grab my hand and pull me to my feet. Am I just going to stand here for a minute? Nope. As they lead me closer to the stage, I realize I'm in for a real treat. 
They sit me down at a table and strap me into a giant plastic chest guard with an apron below. Turning on a boom box, we all bob our heads, lights blaring down on me. I can't see anyone out there, but oh boy, I know they can see me! 
All of a sudden, a gelatin mold is catapulted into the audience, and the Blue Men are pulling out Twinkies, handing one to me, too. Oh no, are they going to make me eat this? When can I tell them I'm vegan, and I don't eat Twinkies?! 
I proceed to open all four packages and pass them down to each Blue Man, because apparently these alien men don't know how to open Twinkies. We all have forks and knives, and we cut up and eat little bites. We exchange strange googlie-eyed looks, their affirmation of what to do or waiting for me to figure it all out -- I'm not entirely sure. We feed each other; a Blue Man feeds me a bite of Twinkie. 
Then holes in their chest start to spew liquid Twinkie, as does mine, the plastic chest piece coming into play. It's squirting full force and I'm squealing and laughing. I lean back and squirt this projectile "goo" at the first few rows of the audience. 
A Blue Man scrapes up a bit of their 'vomit' and places it in a Chinese to-go box with a bow; how thoughtful, a present for me. The crowd applauds as they escort me to the stairs of the stage and snap a photo. 
Laughing, I return to my seat, still trying to figure out what just happened. The rest of the show is just as fun, with more audience interaction. Afterward, we leave the Times-Union Center with the best souvenir a girl could ask for, the Polaroid picture, while overhearing fellow audience members say, "Hey, that's the Twinkie Girl!" It was an unforgettable night for sure! 

Original post here written for the Florida Times Union.


Sewing Machine Diagram

$
0
0
As friends of mine start to dive more into sewing, and I refer them to my tutorials, I hear the helpful constructive criticism that I never started at the beginning, for novice sewers. So here it is. A diagram of a sewing machine to help you get to know your machine. This diagram may, and probably does, vary slightly from your machine, since this Singer of mine is older, but they're all pretty similar. The stitch selectors may be round knobs, the reverse in the center of one of them. The power switch is probably on the side. Bobbin may not be a drop down. Presser foot lever is probably on the side of the presser foot, while this machine's is on the back side. But you get the idea. 

Read the explanation below of all of the parts to help you get started...

Parts:

Balance Wheel: the crank wheel on the side of the machine that moves the needle up and down. Also commonly refered to as the hand wheel.
Bobbin winder: this is where you make your bobbins. Place source thread on the spool pin, and feed the thread through a thread guide on the top and back to the empty bobbin. Push bobbin in towards winder until it clicks. *Usually* this will disengage your machine's needle from going up and down. If it doesn't, try pulling OUT on your balance wheel.
Spool Pin: This is where your spool of thread goes. Thread your machine starting here!
Tension Control: This is the control for the tension of your machine. Read your manual and adjust this only when necessary. Most machine have automatic tension settings. A good way to check your tension is to sew white fabric with a red bobbin and blue upper thread (or just difference color thread from the color of your bobbin). Sew the fabric. If you see the red come through to the top, your tension is too high, too tight, and if the blue thread show through the bottom, it is too low, too loose. 
Upper Tension Regulator: Your thread passes through this and this is how the tension control is applied to your thread. Thread your machine with your presser foot lever up. This opens the disks in the upper tension regulator. When your presser foot is down, you will notice the tension pulling back, when you tug on the thread.
Thread Guides: Thread passes through these when threaded through the machine.
Thread Take Up Lever: The take up lever coordinates with the timing of the needle, lever up, needle is up. Thread passes through this and prevents thread from wadding up when you are sewing. Older machine may require you to actually thread it through a hole, with newer machines having a slot.
Presser Foot: The presser foot exerts pressure on the fabric as it is pushed under the needle. You machine will have the option to change out the KIND of presser foot with special attachments for all kinds of sewing. i.e. zipper foot, rolled hem foot, button hole foot. There are all kinds of amazing and fun attachments. Don't just limit yourself to the one on your machine.
Presser Foot Lever: Lifts and lowers the presser foot. Lift up when threading machine.
Throat Plate: The metal plate beneath the presser foot. Will have useful thread guides for when you are sewing. It is removable for dusting and cleaning your machine, and also covers the bobbin and bobbin case.
Feed Dogs: The teeth that feed the fabric through your machine. These feed dogs also control the stitch length and how fast the fabric is fed through the machine. DO NOT pull or push your fabric when you are sewing, let the feed dogs do all the work to prevent breaking a needle.
Bobbin Case and Housing: This is where your bobbin and bobbin case are. Be sure to thread your bobbin case properly. This will vary by machine.
Stitch Length Regulator: The length of your stitch. The number of stitches per inch is generally what the numbers reflect.
Stitch Selectors: Switch between straight, zig zag, and other embroidery and stretch stitches depending on what you are sewing. 
Reverse: Lock your stitch in place by sewing a few stitches in reverse at the beginning and end of your seams. While pressing down on the pedal, push in reverse. Some newer machine may not require you to press down on the pedal.

More novice sewing lessons coming soon!
Viewing all 358 articles
Browse latest View live


Latest Images